Status Reader
Overview
Eventfinity has different ways to track attendees and one of those ways is the ‘Status Reader’ that is found in Dashboard (Side navigation > Onsite > Reader Setup > + Add Reader > Reader Type is Status Scanner). The status scanner can be used for multiple purposes. One is to track who has entered a room, another is to flip a status of the attendee that has scanned (ex. Flipping that attendee to checked in, or flipping the print status to print reconciled), and the status reader can also be used as access control. The reader can be setup to look for certain fields to know if that attendee is allowed into the area they are trying to scan into. For more information on how to set up scanners you can view the demo here: https://webinars.qa.developfinity.com/video-page-plugins/9 . Status Reader like all readers are used on scans.eventfinity.co.
Setup
First section
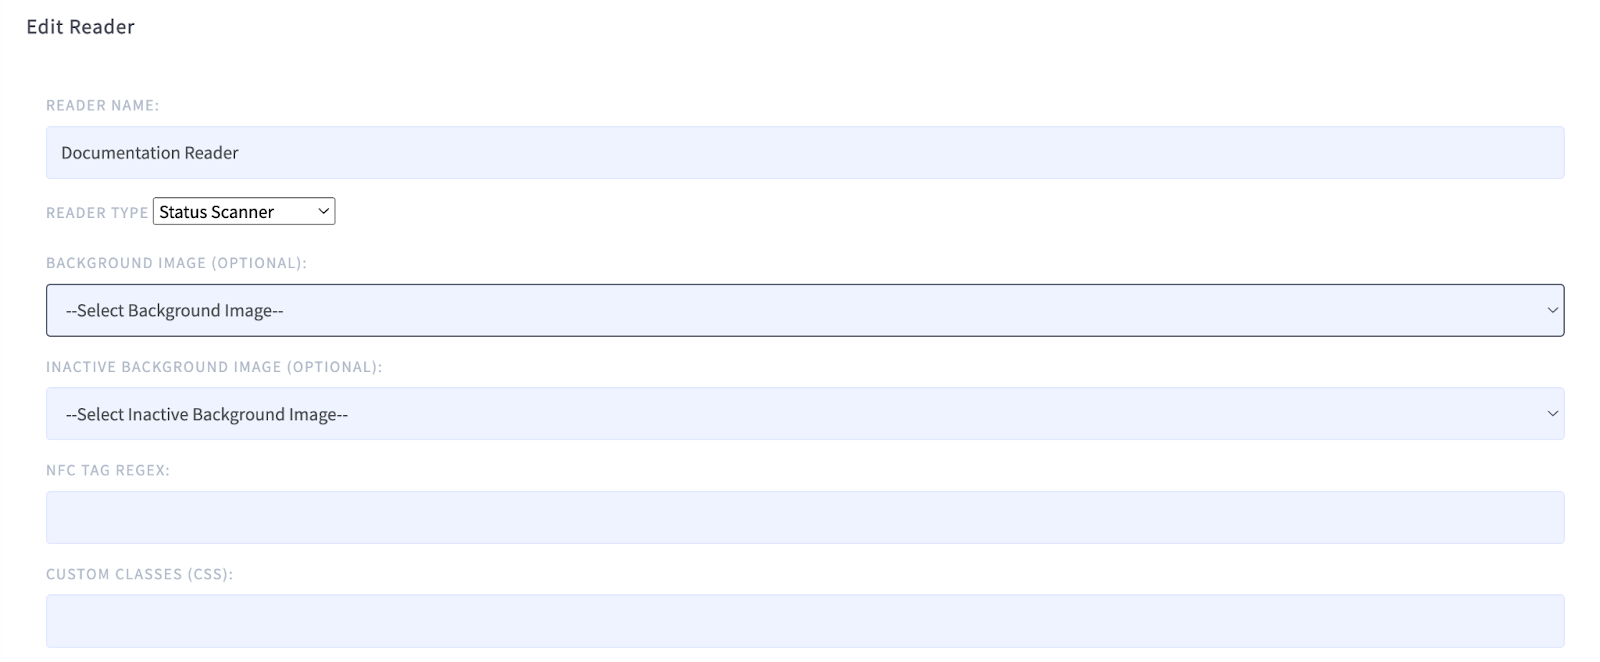
When setting up a status reader you first want to create your locations. The first question the setup asks is the ‘Name’, Reader Type, and ‘Location’, if the location isn’t created you need to go to the locations page and create the location then go back to the reader page. Follow these steps to get to the reader page Side navigation > Onsite > Reader Setup > + Add Reader > Reader Type is Status Scanner.
After you fill out name, reader type, and location it will take you to the ‘Readers’ page again and you will see your newly created reader as ‘Inactive’. Click edit to open your reader and finish setting it up. The first section below after reader type is all optional. Background image will look at all your image assets you have in the event. This will allow for a quick add for the background (this isn’t used too much, we usually have a front end developer do a quick styling to make it look a little nicer). Inactive background image is the background of the reader when the reader is marked as inactive (this also is almost never used). NFC tag Regex is only used for NFC when using readers. Custom Classes is the ability to add more css classes for styling purposes.
Checkboxes
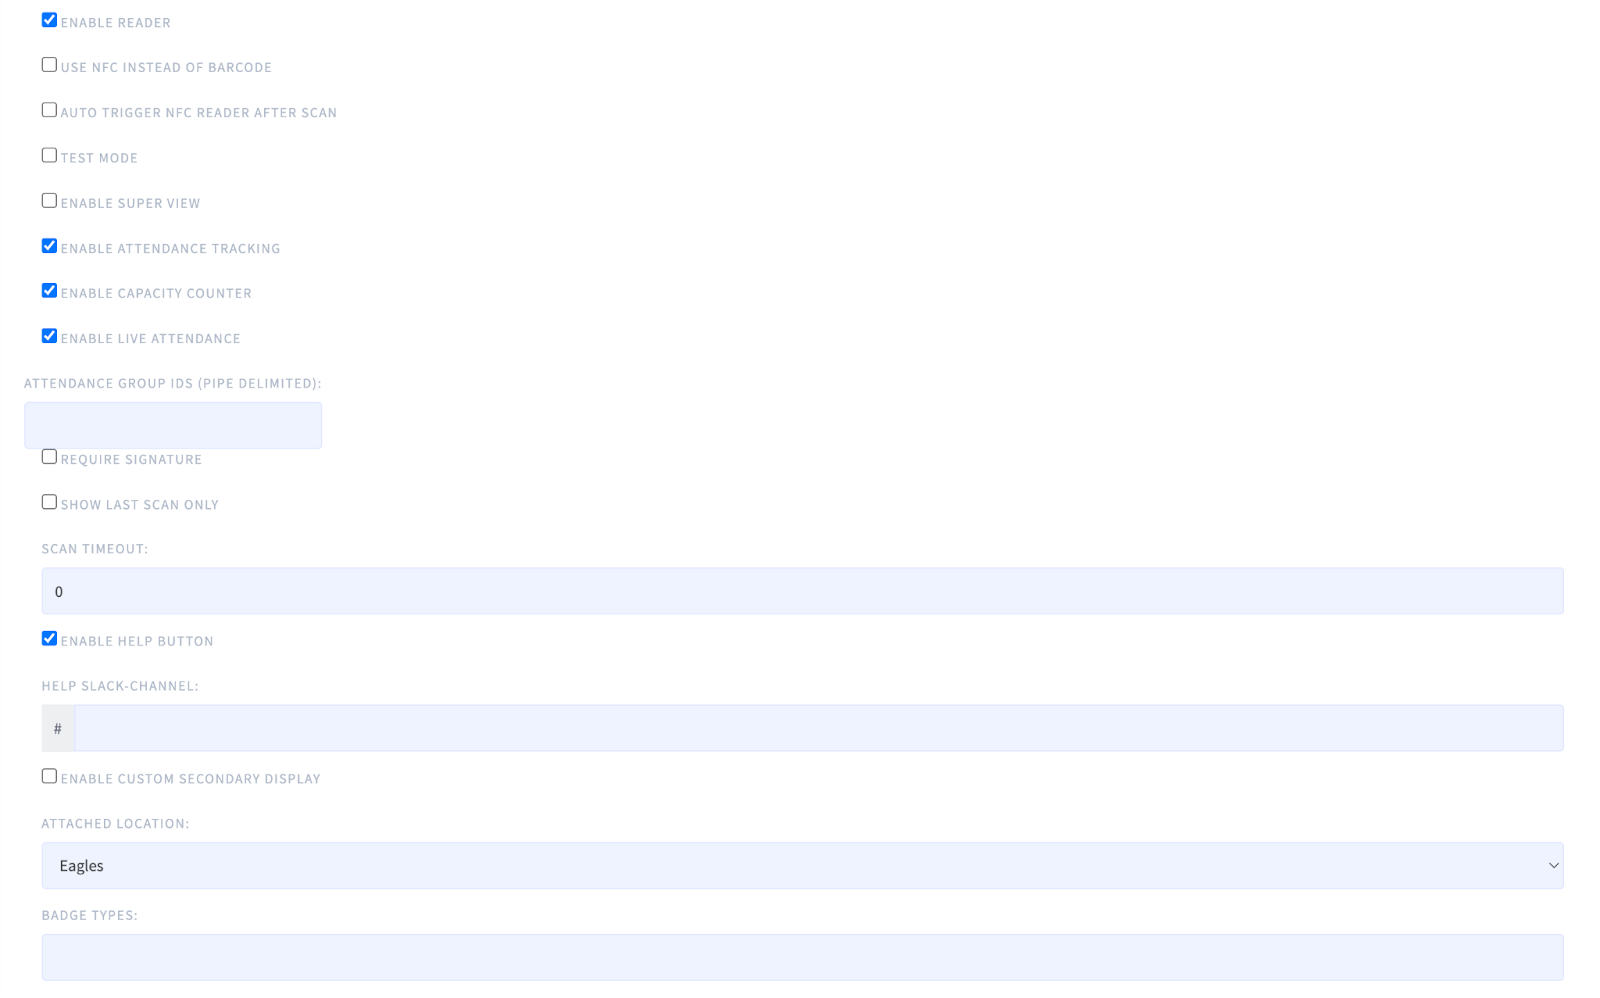
The next section of the readers page are the checkboxes for different features. The first one you need to check to enable your reader. This should be the first thing you do on this page to make sure it is active.
The second checkbox is used if the event is using NFC instead of barcodes. This will be a different setup where you wouldn’t have barcode scanners but instead an NFC readers at the scan locations. The third checkbox ‘Auto trigger NFC Reader After Scan’ goes alongside the second one. This will make sure the NFC is read and pushed through automatically without having to hit enter when an attendee walks by the reader.
The third checkbox ‘Test Mode’ is to be checked when you are testing the readers after their first creation. This allows admins to delete their test scans before the event so the data is correct (personally I don’t use this too often. I just delete my test scans before I send the report since it’s not too many).
The fourth checkbox is Superview. For this one you want to make this its own reader and it will allow you to pull up all the pages of a certain location at once to monitor the scans page from somewhere else. This is useful when volunteers are scanning and you want to see how scanning is going. This screen does not update live and will need a refresh but a good way to monitor more than one reader at a time. Just make sure to have the readers on the same location.
The fifth checkbox ‘Enable Attendance Tracking’ allows you to track who has scanned into that reader live. The reader itself will show you the last 30 people who have scanned but this adds a button labeled ‘View Attendance’ that will show a list of every individual who has scanned in.
The sixth checkbox ‘Enable Capacity Counter’ will put a capacity counter at the top of the reader page. This isn’t used too often since the reader already comes with ‘Current Count’ and ‘Unique Approved’. This one is used more for other readers when there is a capacity limit and a scan in and scan out for the same location.
The seventh checkbox ‘Enable Live Attendance’ is used for scan in and scan out. If you click this checkbox it will bring up an ‘Attendance Group’ and you will put the group id of the attendees you are looking to scan. This is to track who is in the area at all times. This will add a tab labeled ‘View Current’ and this will show who from the group you attached is in the room. This required another reader to scan out so it removed them from this room as well. This feature is better used with the reader type ‘Attendance Scanner’.
The eighth checkbox ‘Require Signature’ is usually used for distribution. When the credential is scanned out a button will appear saying ‘Signature’. That is to be clicked and a modal for a signature box will appear. This allows the attendee to sign for their credential.
The ninth checkbox ‘Show Last Scan Only’ is exactly what it says. This will show only the last person who has scanned into that reader. The data will save everyone but the reader itself will only show the last person.
‘Scan timeout’ is how long the reader will be open with no scan activity. This is usually set to 0 so it doesn’t timeout but if there is an event that needs to be locked down we can set the timer so if it is inactive for that amount of time it will need to be logged back into.
The tenth checkbox is ‘Enable Help Button’. When this is checked off it will add a text area where a slack channel can be entered in. When this is checked it will also bring a question mark button onto the reader. This allows whoever is scanning to request help without having to call the scanning lead. This question mark will send a message to the slack channel that is put in and the staff will know which reader is sending this message. This should always be checked off if the team scanning is not Gramercy Tech scanning. After the message is sent make sure to click the question mark again, that will reset the help button and send a message saying the issue was taken care of.
The eleventh checkbox ‘Enable custom secondary display’ allows for a second display if needed. This is usually never used.
Following the checkboxes we have two fields, the location field which will bunch other readers with the same locations and badge types. Locations just need to be attached for the reader to work but badge types can be put in to limit just those badge types to scan into this location. The badge type ids can be put into the text field (if you need more than one they need to be separated by a comma) and those badges ids will be the only one approved when scanning into this location.
Styling
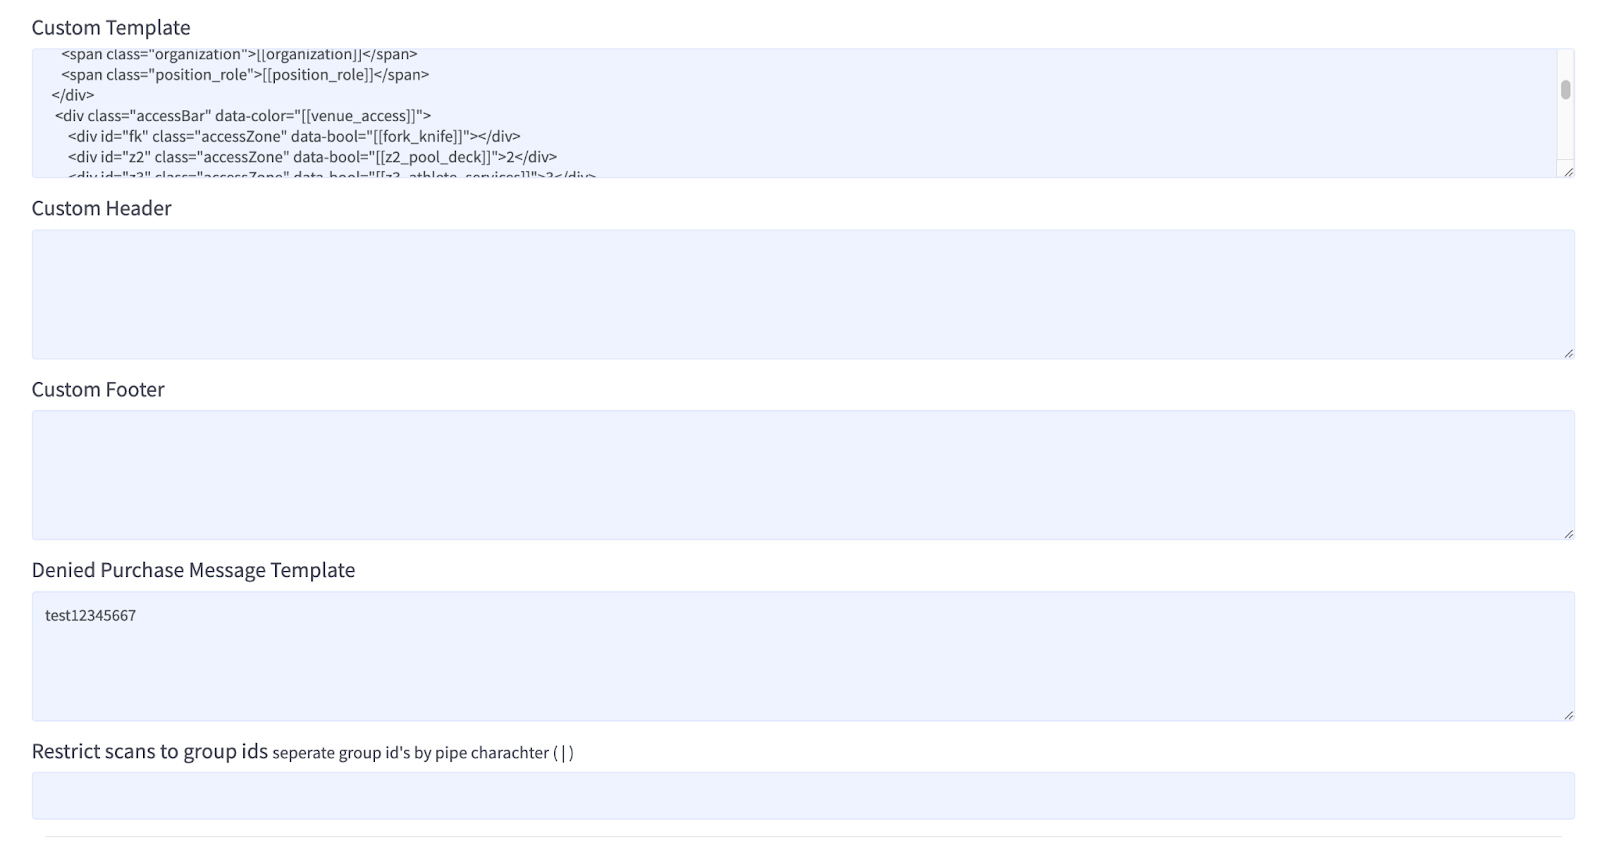
The next section is where all the styling is put in. Mostly the ‘Custom Template’ is the area that is used. This section brings in the art and color you want for the reader. You can have logos, and custom styling for approved and denied scans. Front end developers can make each scan page unique with different stylings. This is also where the fields you want to show up when an attendee scans go. First name and last name are always there to start but any field we have in attendee fields can be brought into the scan page. Usually we have first name, last name, org, photo, and access if needed. We have had pretty custom readers created so talk to your front end developer to have something nice created for your event.
‘Restrict scans to group ids’ is used kind of like the ‘Badge Types’ section above. This is used to only allow certain groups to scan into this reader. If you want to do access control by groups this is how you do it. Any one in that group will scan green and if they are not in the group they will scan red for denied. To add more groups you need to separate them with a comma.
Custom query
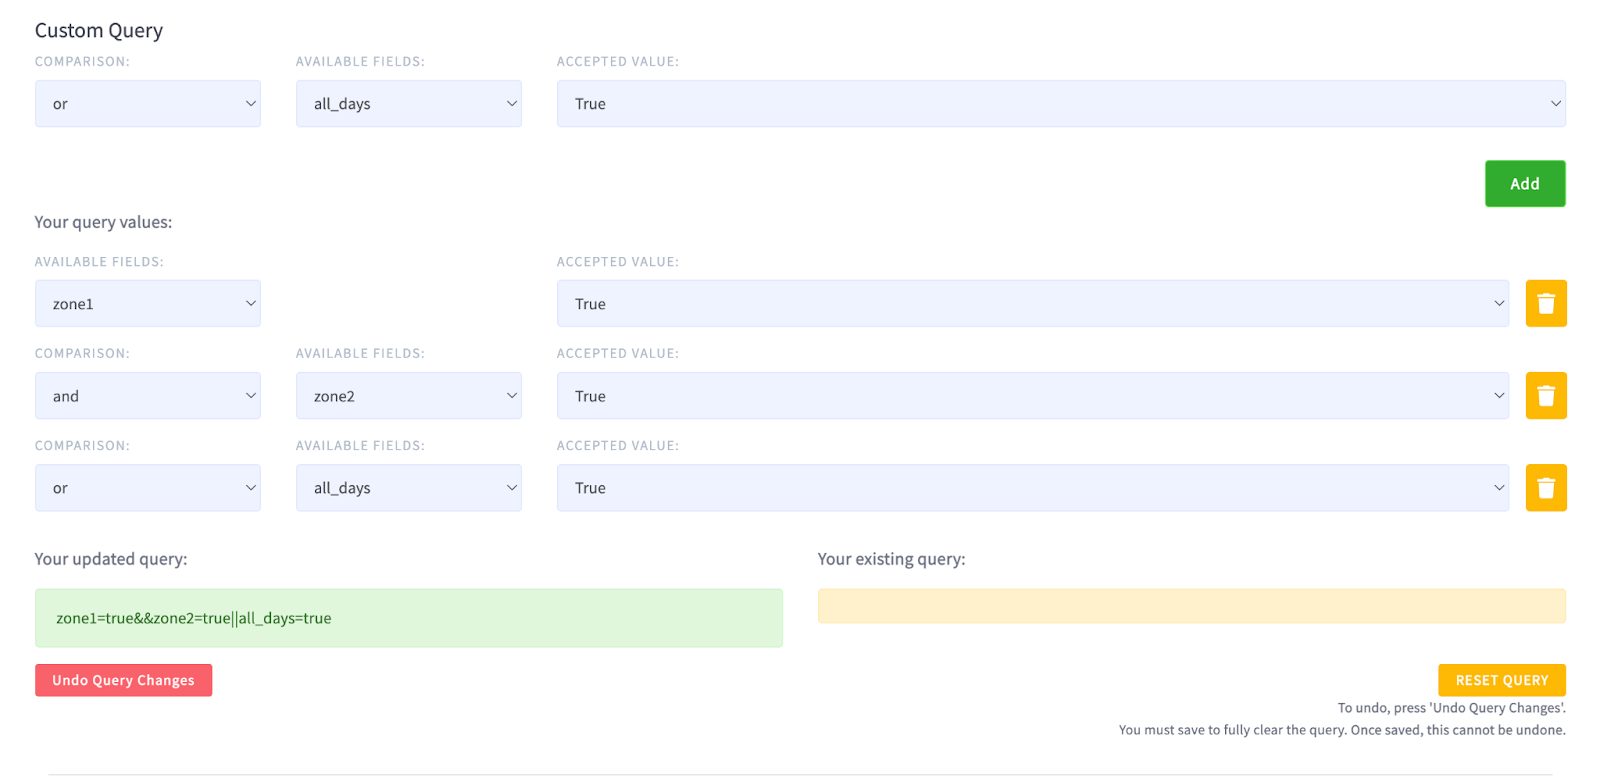
The custom query section is used for access control. You can select any attendee field and the reader will look for that field value. If you are doing access control with zones then the attendee field for zones should be checkboxes. This will make it easier to setup the access points. Examples in the custom query you all Zone 1 set up as a checkbox and in the query you look for ‘Zone 1’ and when you select that zone there will be an ‘Accepted Value’ and you will choose ‘True’. Now if you save the reader here it will look for Zone 1 to be true in the attendee that is scanning in. If it’s true it will be green approved. If Zone 1 is not true it will scan red denied.
When creating access points it can look for more than one zone at a time. Maybe the access point needs Zone 1 and Zone 2, or All days. On the query you can have as many parameters as you need but the best practice is to keep it as simple as possible. For the example above you will set the query to ‘Zone 1’ is true then click ‘Add’ and that will bring in more options. Comparison ‘Select operator’ will be ‘and’ because it needs to be Zone 1 and Zone 2 to be true so then click add when Zone 2 is true. Now all access is also available so for the ‘Comparison’ you will now select ‘or’ and go to ‘All Days’ field and make that true and click add. Now the access will read like this ‘ zone1 - true and zone2 - true OR all_days - true. This now says the attendee needs to have Zone 1 and Zone 2 to enter this point OR have All days. All days trumps zones 1 and 2.
Distribution reader
The distribution reader section is used to edit attendee fields. The most common uses are used when printing credentials before an event and shipping them. The reader will use print_status the col value is Print reconciled. This will switch all badges that are scanned from ‘Printed’ to ‘Print reconciled. This allows us to know which badges were printed and in the stack.

Another commonly used one is ‘checkin_status’ is ‘Checked In’. This allows us to check in attendees when they pick up their badges.
This feature can also be used to change text fields to say whatever you want when the barcode is scanned. In Myrtle Beach we use one to scan out equipment and it will change the ‘Location’ field to say the location we put into the ‘Col Value’ section like below. The image below means that we are scanning equipment out and updating the location for that equipment to be labeled that it’s at X Games. When the equipment comes back we will update that value to say Myrtle Beach and scan it again.
