Using the Eventfinity Google Sheets Plugin
Created March 13, 2024
Overview
Our Google Sheets plugin is an internal tool that allows Gramercy Tech employees the ability to download specific event and attendee data into Google Sheets rather than individual manual exports from the dashboard. This plugin is still in development so only select aspects of Eventfinity can be imported at the moment.
This article will cover
Requirements
- A Gramercy Tech email address with permissions to the Gramecy Tech shared drive to access this internal plugin
- Google Chrome browser that is logged into your Gramercy Gmail account. To check if you are logged in with the correct account, click on the top right user avatar in Chrome and make sure the active email is your Gramercy email.
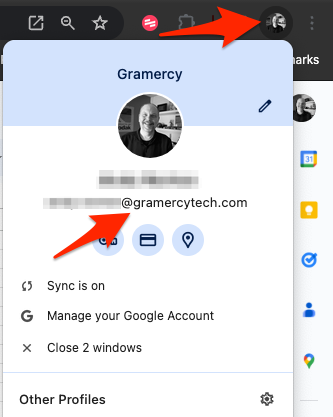
- An Eventfinity public API key. This can be requested from Product & Development by opening a CPF ticket and adding a description of what data you want to be imported into Google Sheets as well as a link to your event in the Eventfinity Dashboard.
How to Install the Plugin in Google Sheets
1. Make sure you are logged in to your Gramercy Google drive account and create a new Google Sheet. The Google users avatars should match in Chrome and Sheets.
2. Click on Extensions > Add-ons > Get add-ons
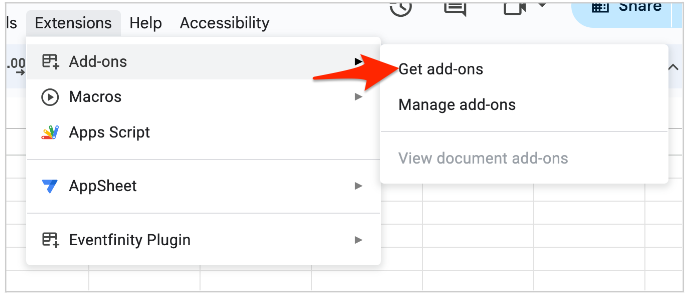
3. This will open a modal. Click the hamburger menu button on the top left in the modal.
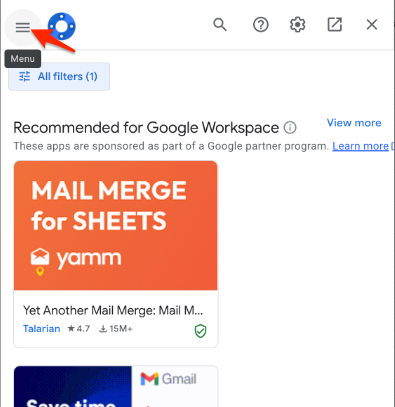
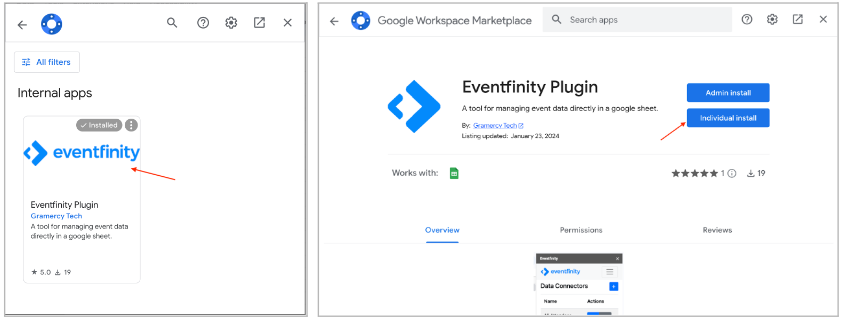
4. Scroll down and click on Internal Apps
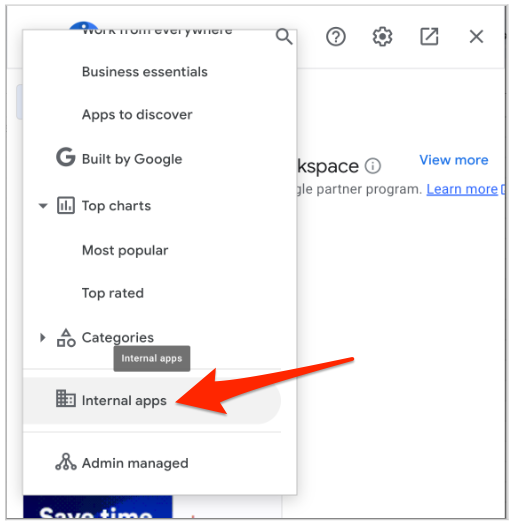
5. You should see the Eventfinity Plugin by Gramercy Tech. Click into it and then click Individual Install / Install.
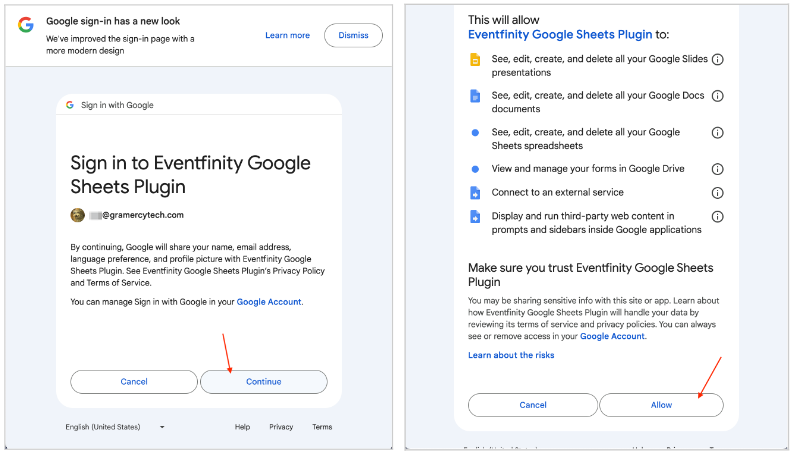
6. Give the plugin permissions.
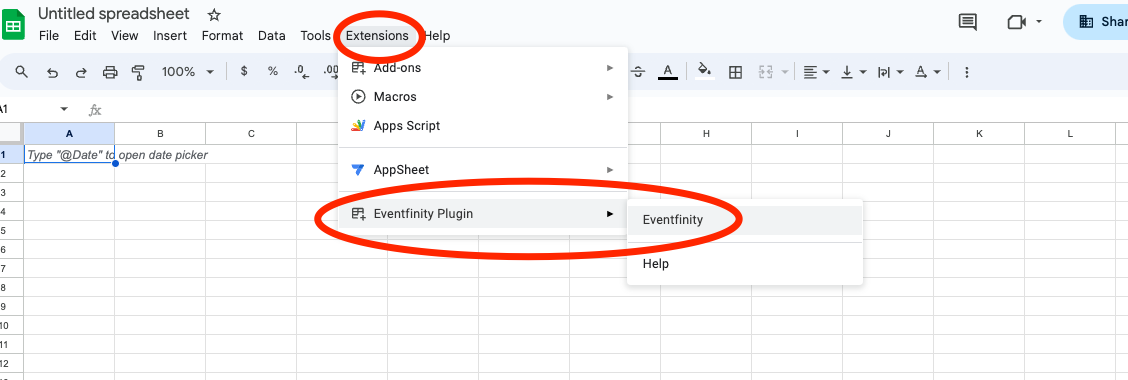
7. After the plugin is installed, please refresh the page. After refreshing you should see Eventfinity Plugin under Extensions in your sheet’s menu.
Plugin Setup
Things you will need for the setup:
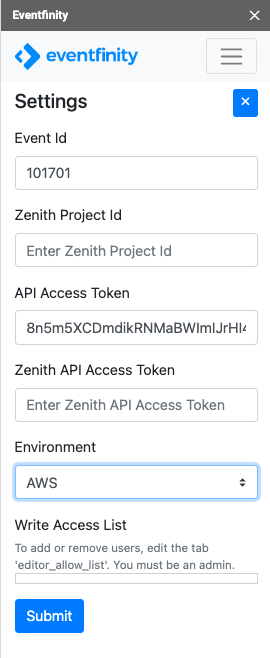
- Eventfinity event ID
- Eventfinity public API token
- Which environment your event is in:
- dashboard.eventfinity.co is AWS
- dashboard.eventfinity.io is Google (GCP)
- All other environments are for testing purposes as we develop this plugin and should not be used unless otherwise specified
- Zenith fields are for development and testing purposes only and should not be used
- Write access should not be added or edited unless given direct permission from Leadership or Product
1. Click on Extensions > Eventfinity Plugin > Eventfinity to bring up the settings window. Enter the required information , click the Submit
button to save. After saving, refresh the page.
 2. Click on Extensions > Eventfinity Plugin > Eventfinity to bring up the settings window again, but now there is a new Data Connectors view. Click the plus button to add a new Data Connector.
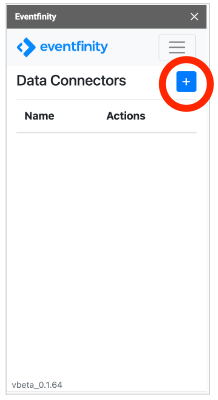
3. Select the Data Connector and add a new one.
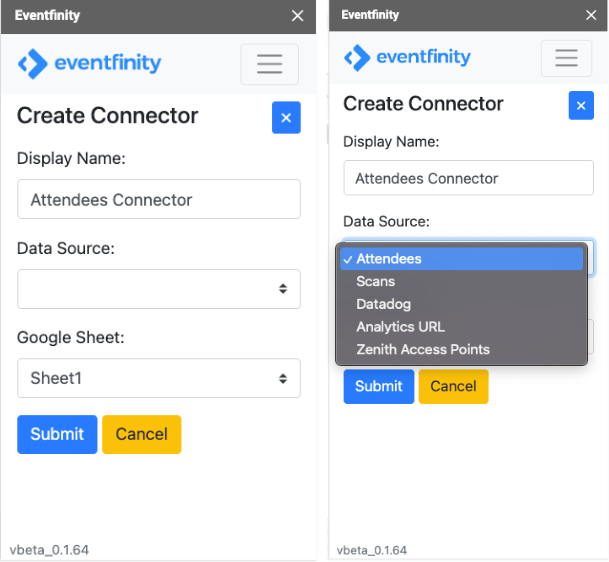
- Display Name is an internal label
- Data Sourceis what data will be pulled into the sheet
- Attendees: Pulls in attendee data
- Scans: Pulls in scans records from readers
- DataDog: Pulls in analytics data from our 3rd party service DataDog
- Analytics URL: This is not meant to be used outside of the development team
- Zenith Access Point: DO NOT USE! This is not meant to be used outside of the development team
- Google Sheet: This is the tab in the sheet that the data is going to be pulled into
Once the configuration data has been entered, hit the Submit button to save the Connector.
Data Source Specific Configurations
Attendees
This Data Source type has an optional field for Saved Search ID. Saved Search is a feature in the Eventfinity dashboard that allows users to filter down attendee data based on specific parameters in the Saved Search.
If you enter a Saved Search ID in the configuration this will limit the attendees imported into the spreadsheet to attendees only in that saved search.
If this field is left blank, all attendees from the event will be pulled into the sheet.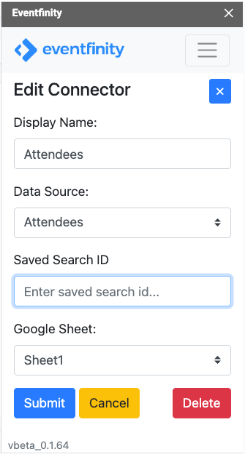
Scans Specific Configurations
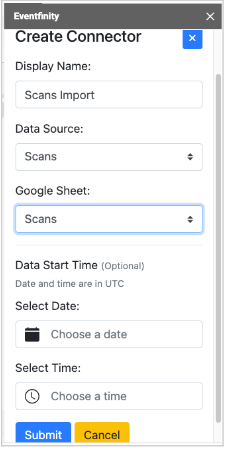
This Data Source allows you to enter an optional start time. If this is filled out, the import will only pull in scans that have been created after this start time.
DataDog Configurations
DataDog is a 3rd party monitoring and analytics service we use with our product. It can provide sessions and page views of specific pages over a specific date range. This Connector allows the user to build RUM queries for DataDog. Here is an explanation of what RUM queries are.
This connector has the potential to import in millions of rows. Unless the data is selected in a specific and targeted way, this can be too much for a Google Spreadsheet to import. It is recommended that you contact the Product & Development team to help assist in setting this connector up.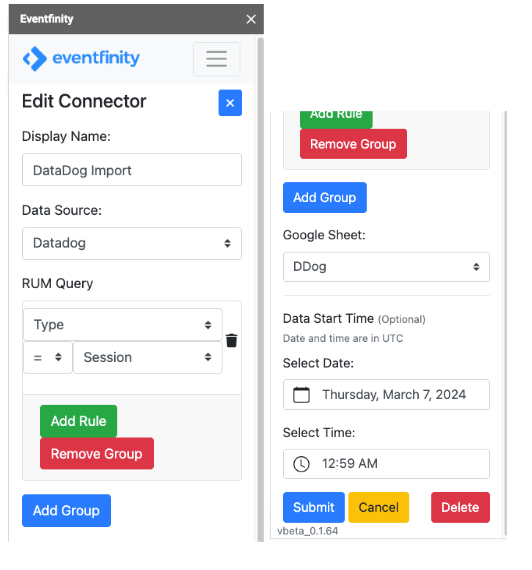
Setting Up the Spreadsheet
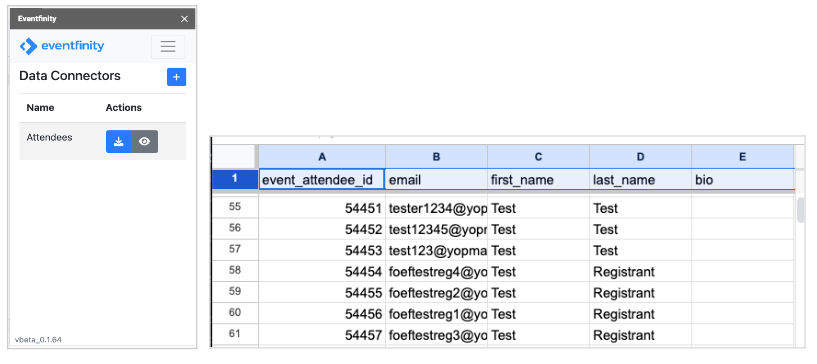
Now you have to set up the column headers for the spreadsheet. Depending on which Data Source was selected depends on what your sheet column headers should be.
Attendees
Required column headers
- event_attendee_id
Valid column headers can include any other event attendee field names.
The column names must match exactly as they appear in Eventfinity for the data to be validated for import.

Scans
Required column headers
- id
Valid column headers
- id
- event_attendee_id
- reader_id
- location_id
- schedule_item_id
- badge_status
- scan_type
- notes

DataDog
Required column headers:
- event_attendee_id
Valid column headers
- id
- timestamp
- duration
- end_timestamp
- browser
- city
- country
- event_id
- event_attendee_id
- attendee_first_name
- attendee_last_name
- attendee_email
- url
- event_name
- user_action_type
- user_action_url
- link
- plugin_id
- plugin_type
- plugin_name

Running the Import
Once your Connector and the spreadsheet headers have been set up and saved, you are ready to run your first import. Click on the blue download button for your Connector to import data.
Troubleshooting
Make sure your API token has the correct permissions and is for the correct event. If you are getting an error pulling data, try removing any extra columns that are not necessary for your import
