Configuring Zebra Thermal Printers for Badge Printing
05/2022
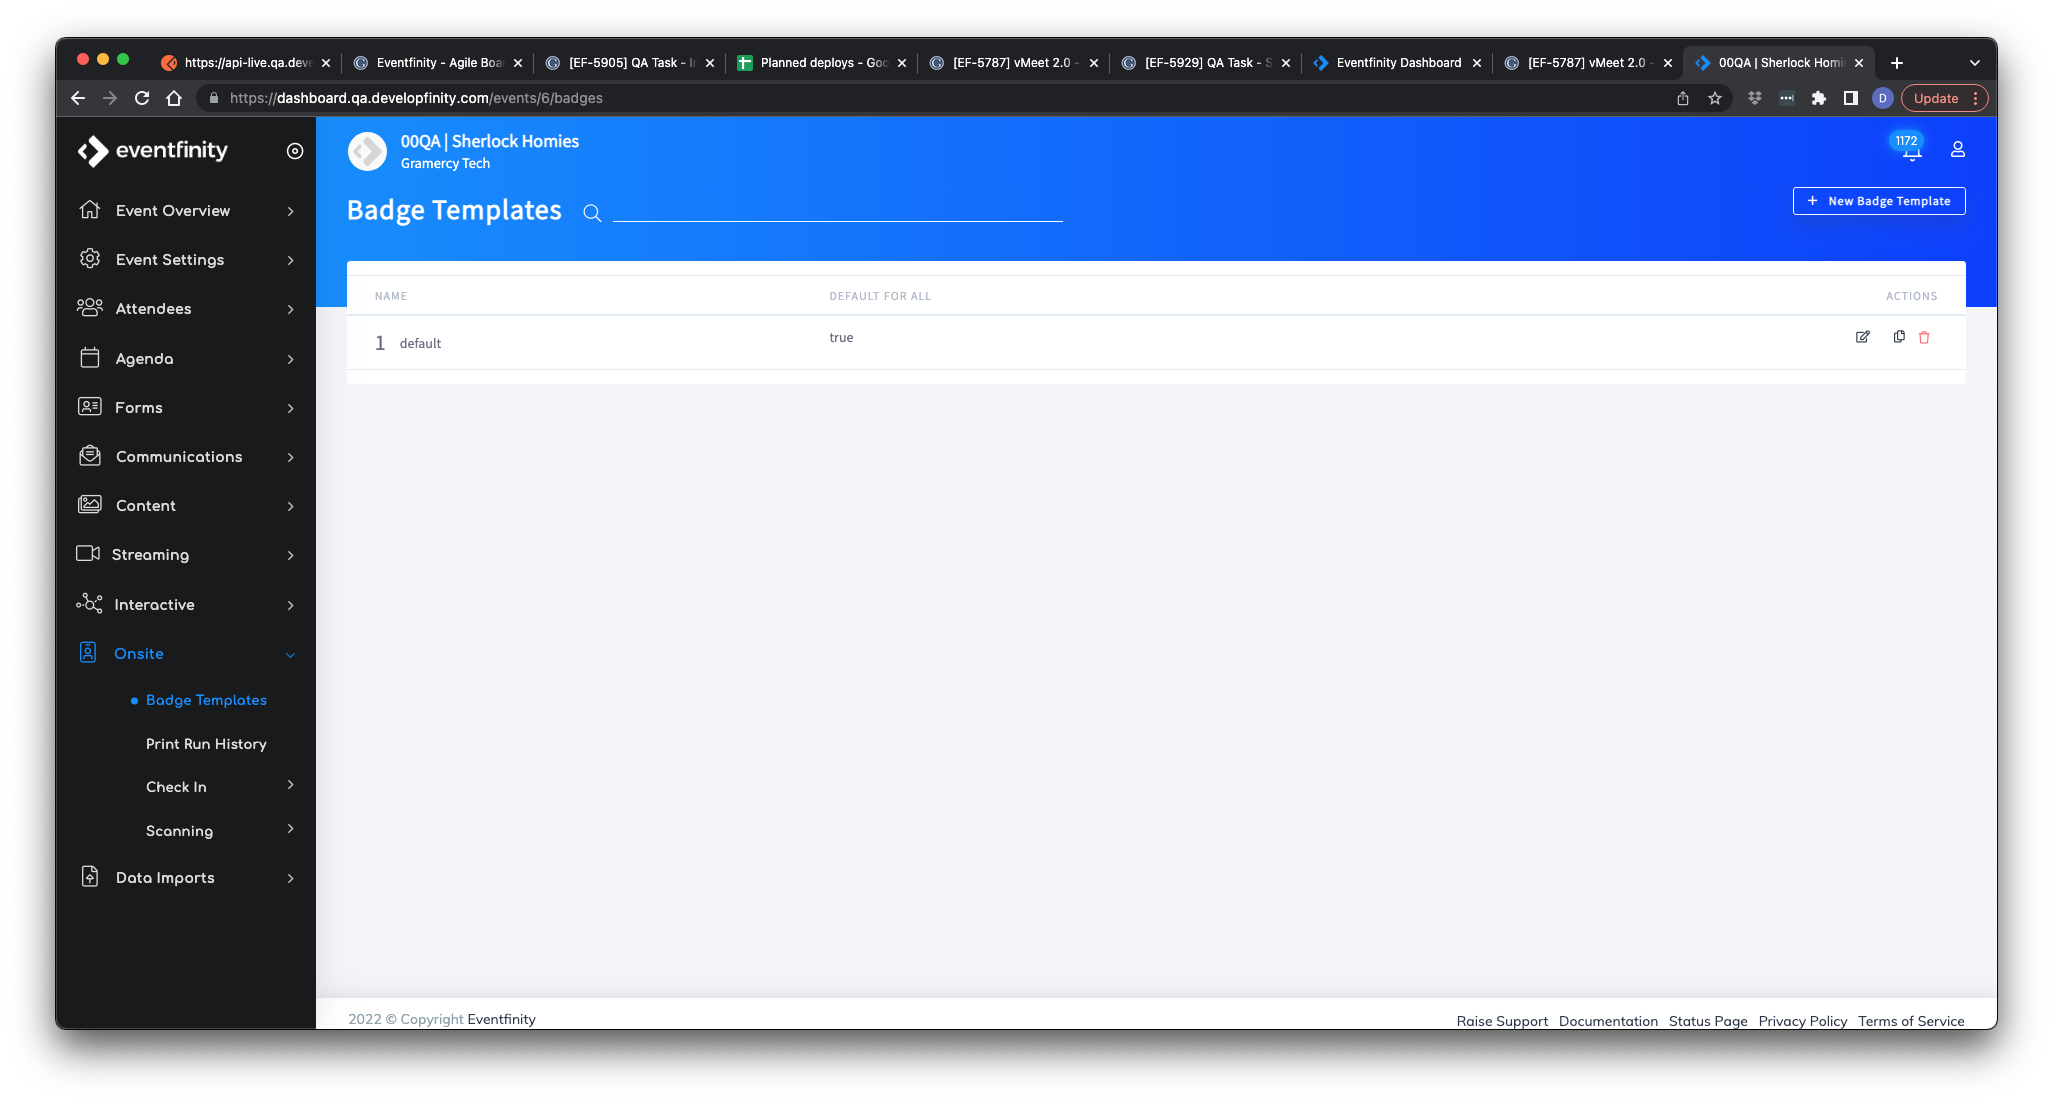
Badge printing on Zebra printers can be setup within the dashboard of your event.
Once you have an event created on dashboard, go to Onsite > Badge Templates and click the "+ New Badge Template" button at the top right to create a new template.
(note- Click the edit icon associated with one of the existing created templates to edit an existing template).
You will be brought to a new screen where a Badge Name can be entered and the option for allowing creation for all attendees. With this opeion, when then attendees are added, this badge type will automatically be assigned to their profile.
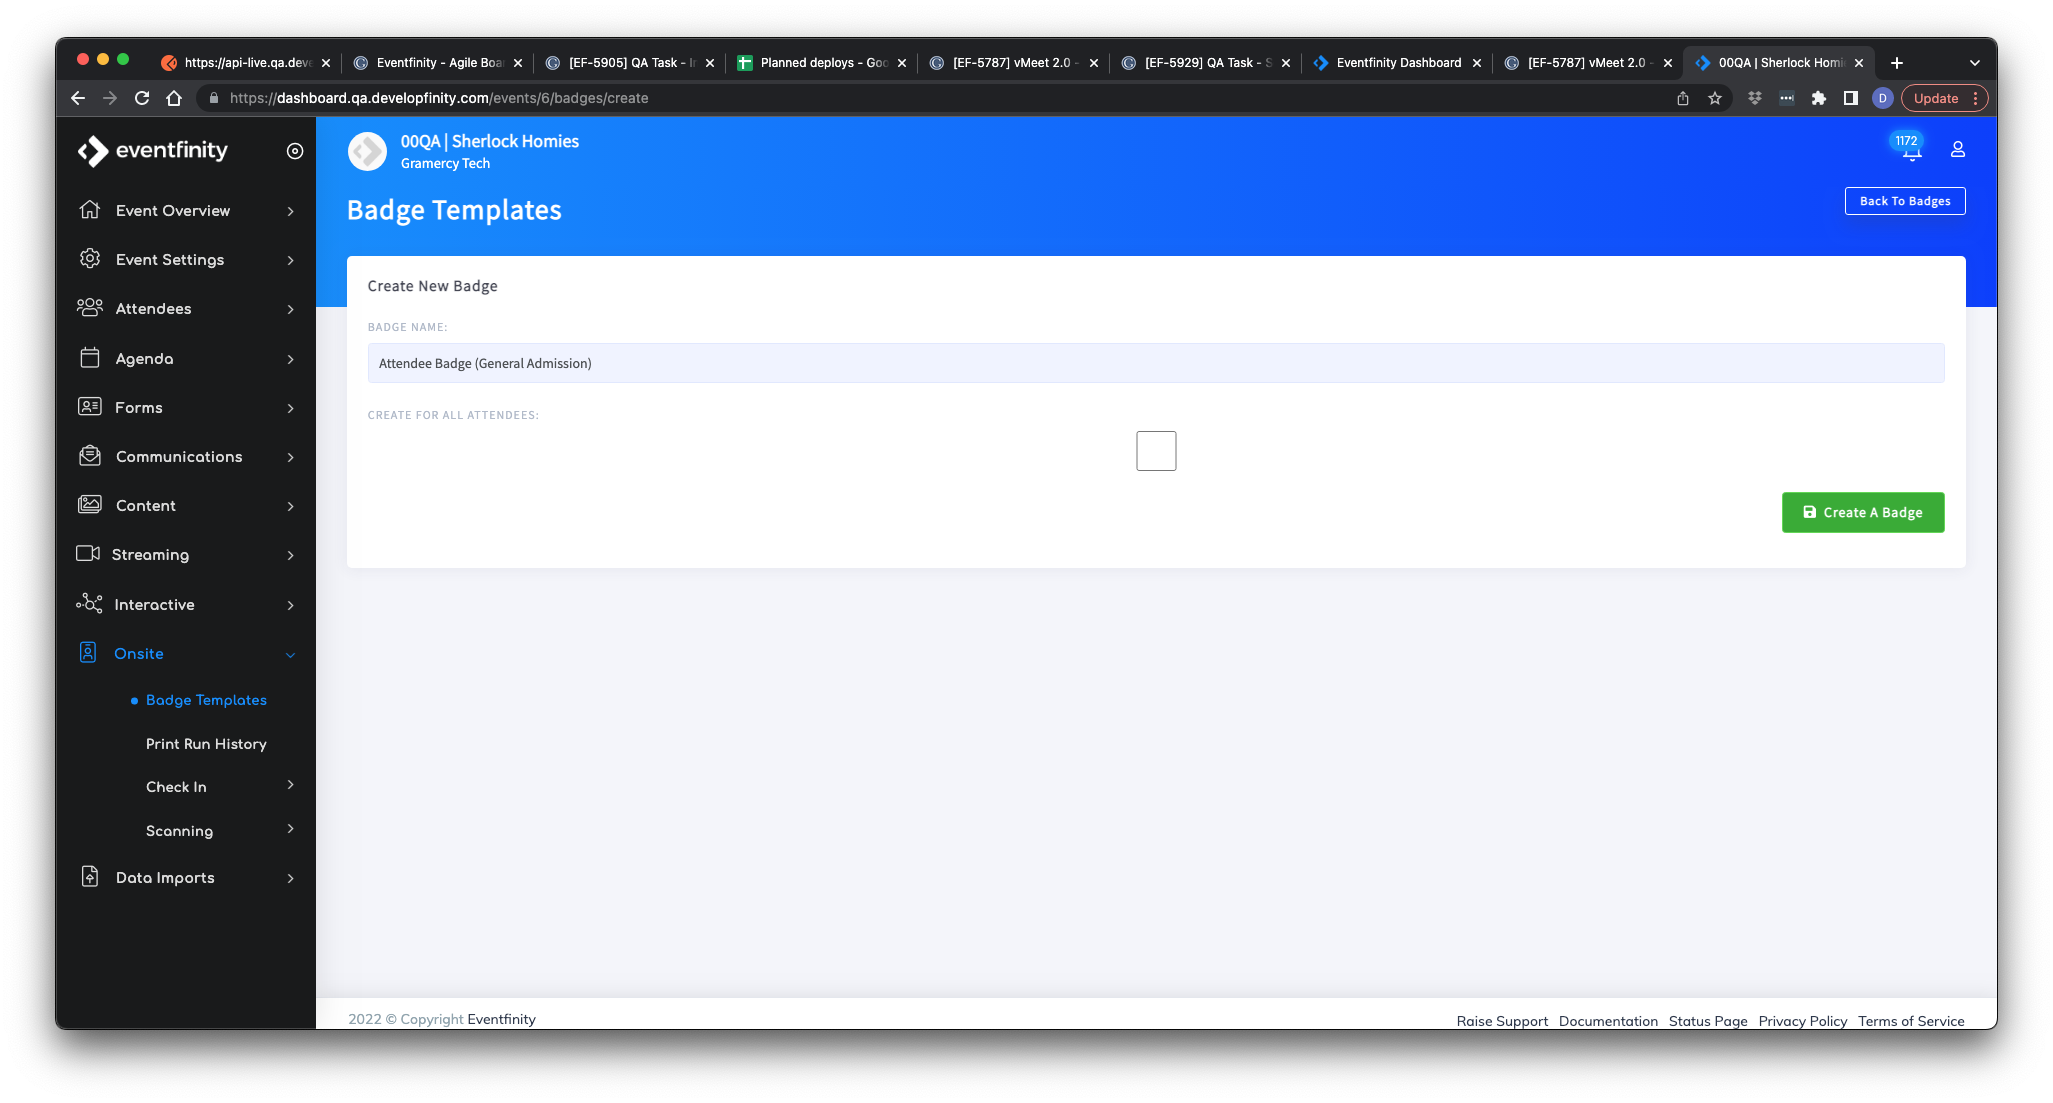
Once you enter a name and click the "Create A Badge" button you will be brought to a new page.
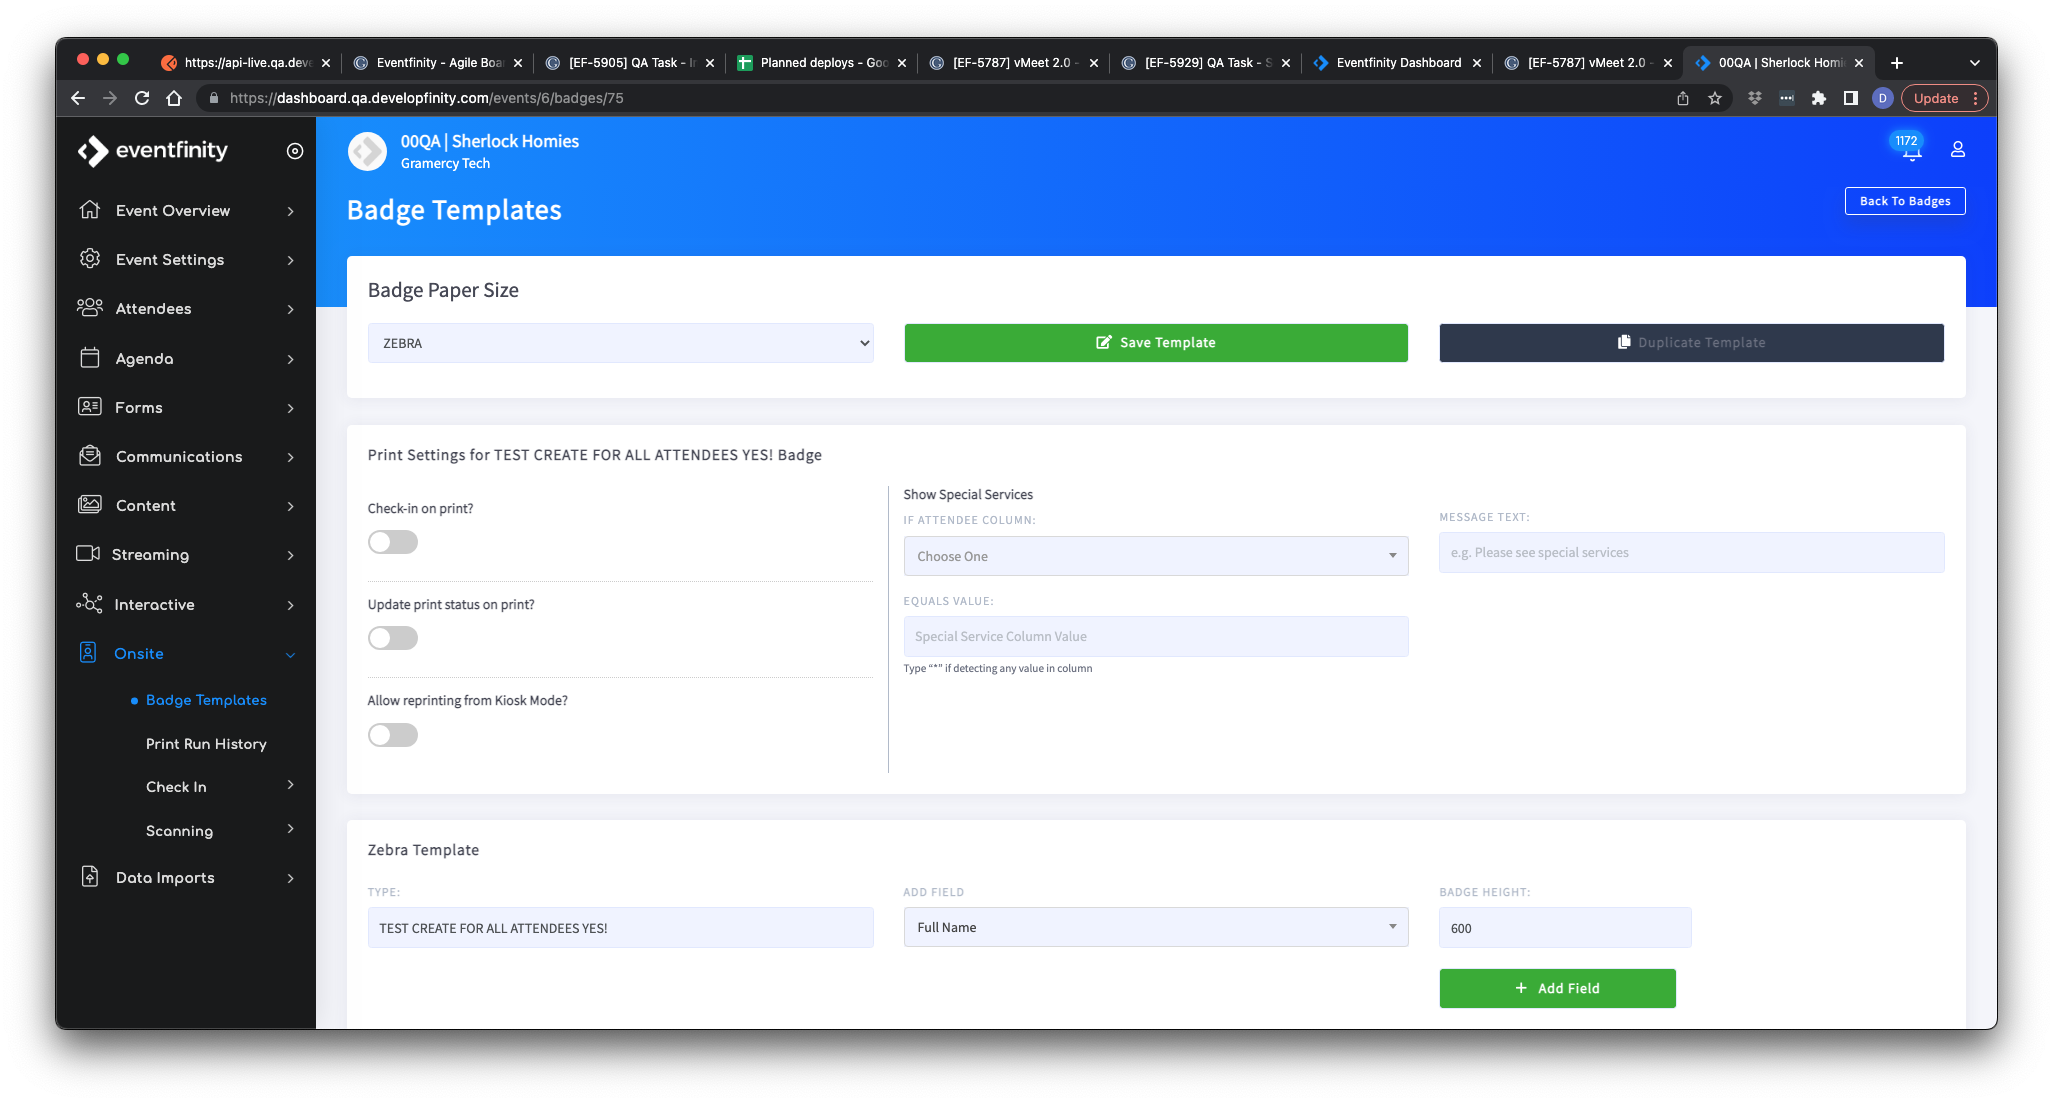
Here you can edit all other settings and options. This page is broken into 3 sections.
- First, select your Badge Paper Size.
- Then select the desired Print Settings for your Badge
- Check-in on print?
- Update print status on print?
- Allow reprinting from Kiosk Mode?
- Show Special Services
- What is this? Is this... if you are this you see this message to go to special services...?
- Enter the paramaters and the desired message.
- Last, add the desired attendee fields to the Zebra Template. To do so, select the desired field(s) from the "ADD FIELD" drop down and click the "+ Add Field" button.
Note- Be sure to save the template before you exit the page as well as always, test prior to your event.