Adding Translations to Events
Overview
Providing a site translated into local languages is not just a nice to have, it’s a got to have for many global clients. Eventfinity can serve translated text across websites by leveraging the Localization tools located within Event Settings.
Ideally, the localization of content by applying translated strings is completed once all English content is finalized.
Eventfinity System String Localizations
System strings are used behind the scenes for a wide variety of commands. Notifications, logout, timezone updates and submit are just a few of the items that are tied to system strings.
Currently, there are 24 languages translated into Eventfinity system strings:
If your translation is in a language not listed above, the system strings will need to be translated as a first step.
As a recommended best practice, ask for a download of the currently translated system strings to ensure new strings from recent enhancements and deploys have been updated in the 24 known languages.
System string updates are done as part of the weekly deployment, so it is critical to have the information translated and ready to deploy at least three-four weeks before the event goes live to anticipate any delays or additional fixes needed.
STEPS
Download the Translations System Stings Localization template.
Add desired new/missing content strings in columns A and B, paying attention to include the single quotation (‘) before and after the text in columns A and B, as well as the comma outside the closing quotation in column B.
Add the new language columns and enter new translations based on the English translation in column B using the language name and standard abbreviations
Sent spreadsheet to translations provider.
Provide the newly translated strings to the back-end deployment team.
Preparing the Event for Localization
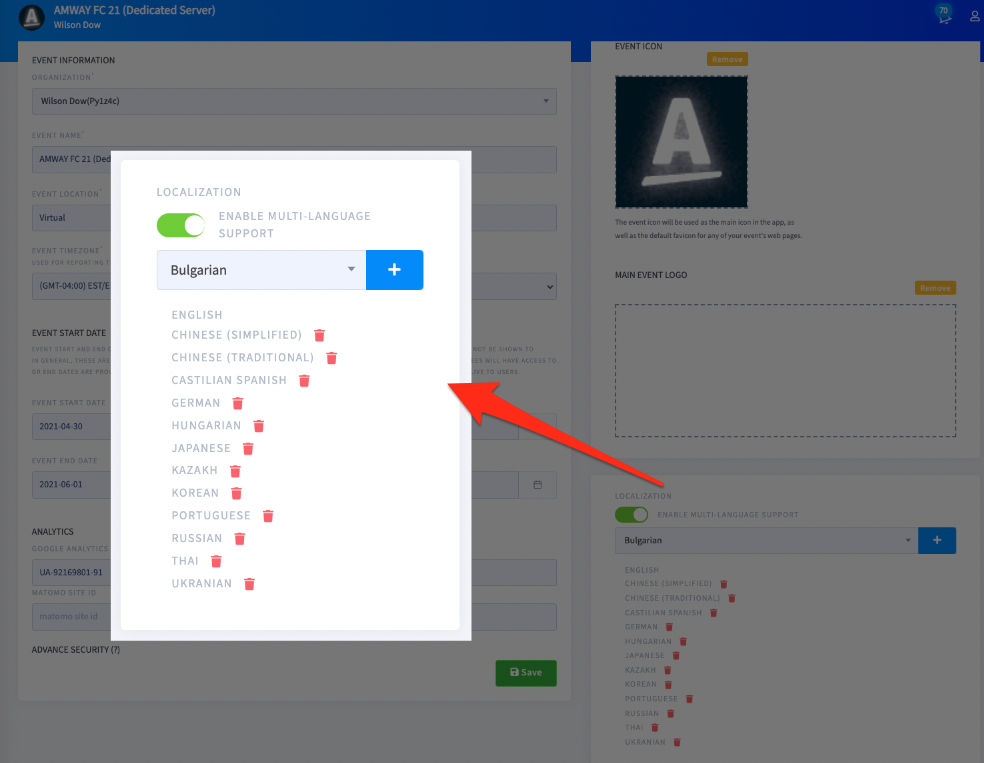
In order to localize the event for translations, the Event Settings > Event Info must have the localizations toggled on, and languages added.
Preparing Localization Strings for Export
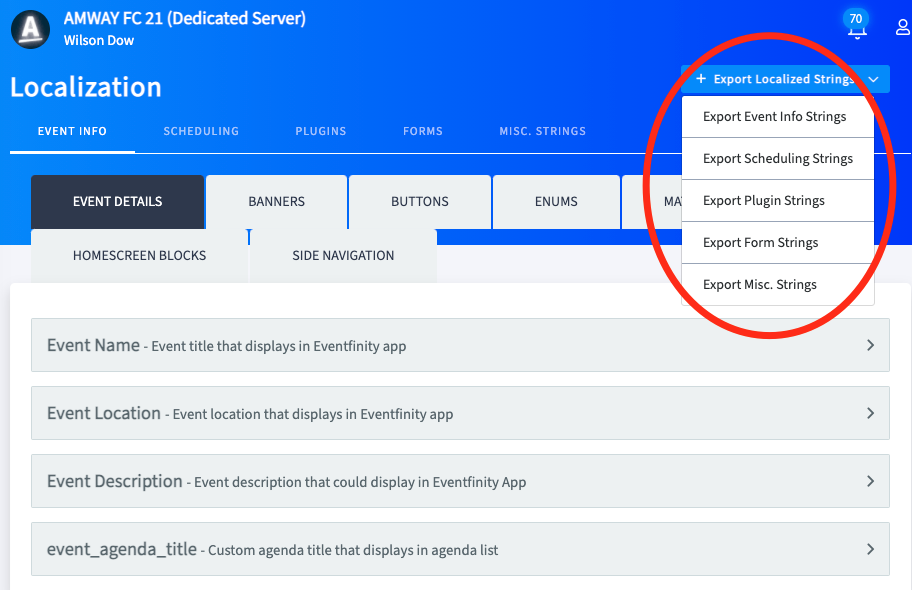
The localization strings are found under Event Settings > Localization. This is where the Event Info, scheduling, plugins, forms, and miscellaneous strings translations are exported and edited after importing.
Once the content is finalized in English, the localized strings can be exported for translations. There are five strings outlined below that can be exported and provided to the client for translations.
After getting all navigation and content entered and client-approved, the next step is to export the strings for translations.
STEPS
Under Event Settings > Localization Export expand the “+ Export Localized Strings” drop-down and select each item for export.
Save the file.
How to Provide Content for Translations
The one constant with content, and especially translated content is that there will be changes. So now that you have all strings ready for translation, it is important to decide how you wish to hand off the exports to the translators. Take a look at Editing Translated Content and then consider these options.
Once a decision is made on how to provide the exports just a few more steps to consider. First, is the vendor familiar with HTML/CSS code? Most translation companies are familiar with code and will not translate the style, div, and href tags that will most likely be present in some of your descriptions. Second, if they are not familiar or you do not feel comfortable and want to highlight what is not to be translated, now is the time to markup or highlight that content. For example:
Opening Remarks <div class="badge tag-badge hidden" style="background-color: rgb(28, 87, 85);">Eastern/Western Agenda</div>
Or
Opening Remarks <div class="badge tag-badge hidden" style="background-color: rgb(28, 87, 85);">Eastern/Western Agenda</div>
Uploading Your Translated Strings
Once your translations are back it’s time to upload after a thorough scrubbing of the data. No matter how you sent the data out for translations a little quality check before uploading will be needed. Items to look for:
Missing string fields - blank cells
Translated code
Miss-matched characters - ie, Chinese characters in Russian, Korean characters in Portuguese, etc.
Make sure there are no changes to the first row slugs from the exports
Once you have revied the data, it’s time to import.
STEPS
Navigate to Data Imports > Importer and select + Create Import and select Event Strings Import from the dropdown.
Drag and drop your spreadsheets here.
Follow normal import approved/deny steps.
Continue until you have imported all strings and languages.
Editing Translated Content
You said it wasn’t going to happen this time, but yet, here they are - last-minute changes. The changes could be minor, a bit of code showing on one agenda item, or the client says wholesale changes are required across the board. No worries there are two ways to handle it.
Option 1: New Upload
Sometimes the end client may review consider the translations too generic, inaccurate or otherwise not translated to the client’s expectations. When there are many changes it may be easier to have the original spreadsheet updated.
If the changes are unique to only certain languages, this is where have having strings in one unique workbook by language pays off.
Option 2: Change within the Localization Tool
If the changes are minor, a piece of code is showing, or just a word or sentence here are there, it usually easier to make the change within the Localization Tool.
STEPS
Navigate to Event Settings > Localization and navigate to the content needing updateing.
Choose the pencil icon to reveal the languages and make the edits.


