Setting up and Running - Stream Conductor
Overview
Stream Conductor on Eventfinity allows realtime management of various assets and streams giving director control on when assets and video streams are being broadcasted onto a Main Stage.
Stream Conductor can be found on Dashboard under Streaming > Stream Conductor.
There are Six Steps to setting up Stream Conductor.
- Assemble and add assets
- Add Livestreams
Create Video Configs for any external client provided CDNs
Add Stream Conductors and Attach Presentables.
Create New Mainstages and attach Stream Conductor
Operate and Start Stream Conductor
-------------------------------------------------------------------------------------------------------------------------------------------------------------------------------------------------------------------------------------------------
Step 1
Assets - Broadcast Slates
- Add broadcast Slates to Content Assets
- Graphics are best as .png files
16x9 at 1920x1080 pixels - Recommended Slates include:
- Opening slate or graphic shown before the event starts.
- Any break or mid-show slates.
- Closing slate shown once the event ends.
- Contingency slates might include:
- Broadcast will begin shortly
- Technical Difficulties, please stand by
VODs - Video On Demand Files
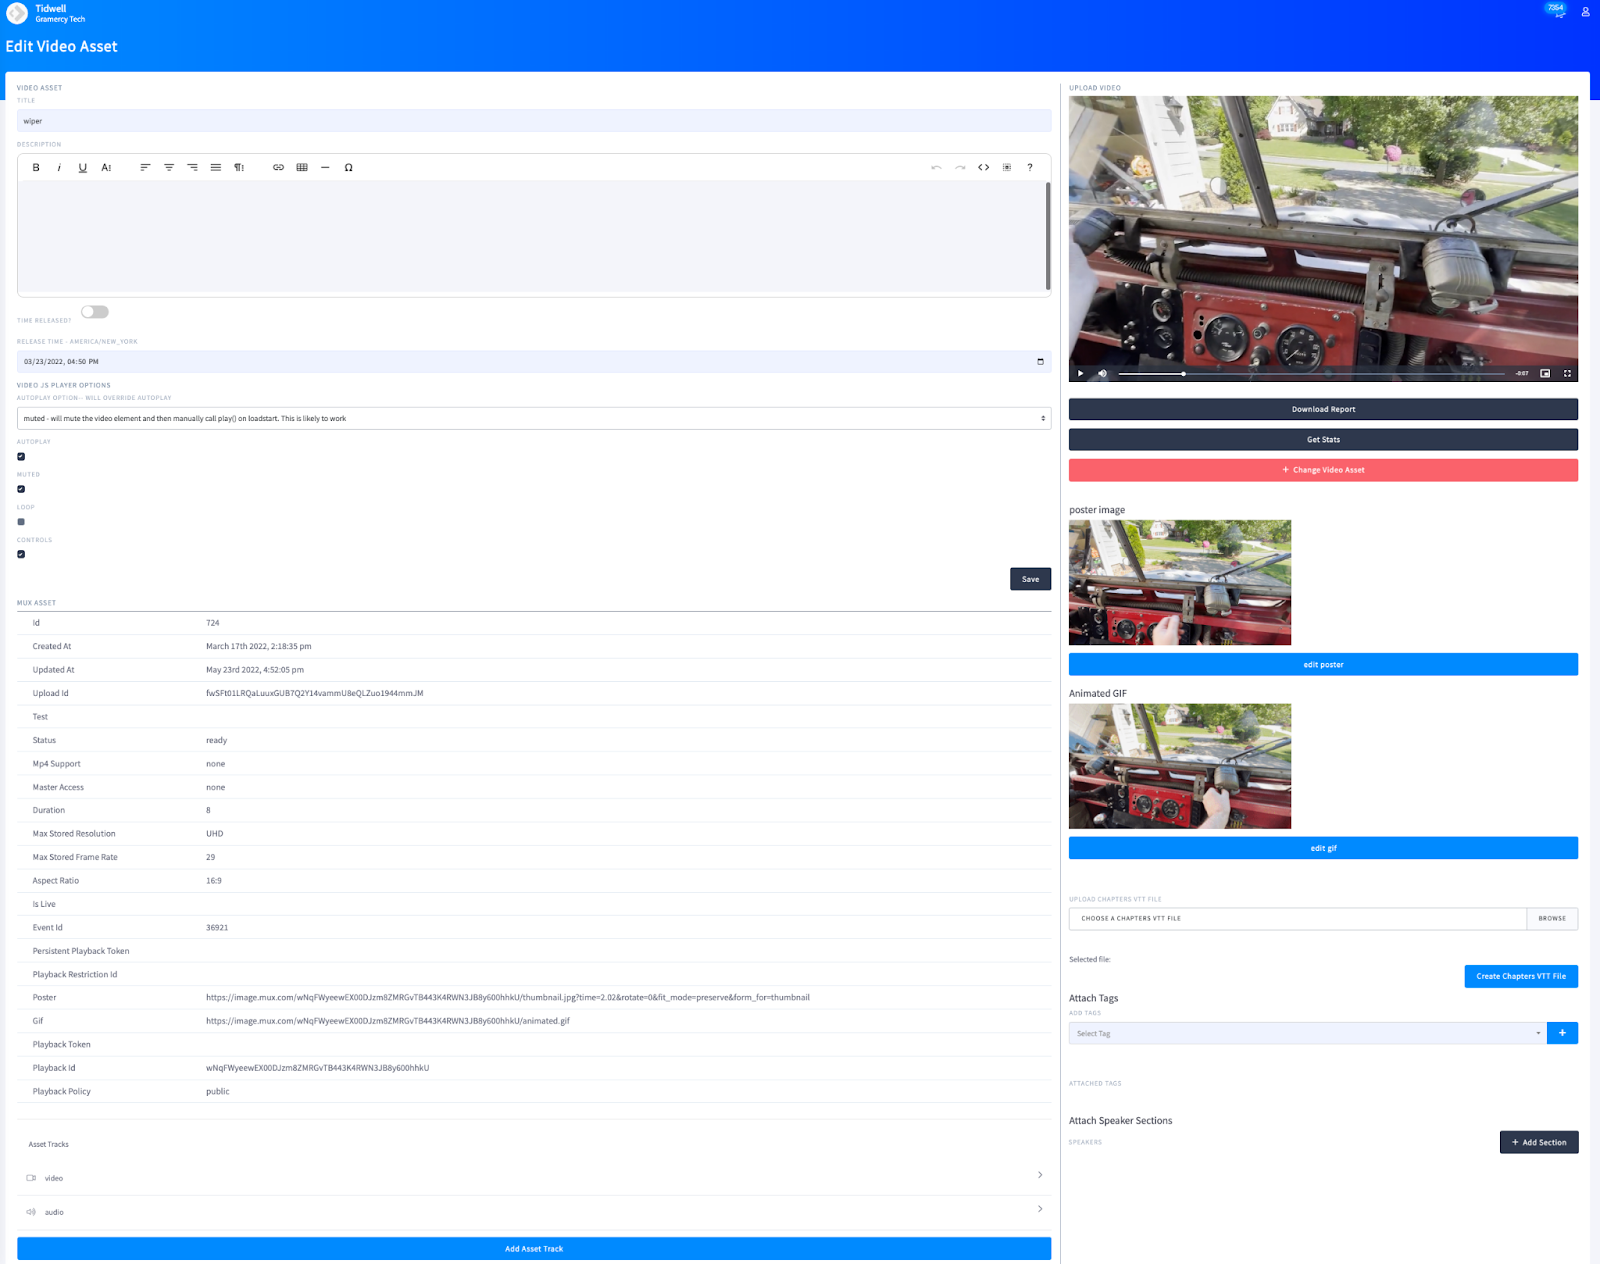
- VODs are uploaded to dashboard into Video Assets
- From the Video Asset dashboard, you can set:
- Poster Image
Chapters
Attach Speaker Sections
Add Closed Captions

- When uploading videos, there are two sets of options for how the video is suggested to play.
- Check boxes to set video preferences.
- Pop up menu for Video JS commands.
You will want to set both in tandem for the best possibility of it working with most browsers.
Please know that the attendee’s browser settings can override any of the below preferences.
- Two most common Video Player options are:
- Video autoplays, muted:
Select check boxes for autoplay, muted and controls, uncheck loop.
Select menu option “muted - will call video element and manually call play on loadstart” from pop up menu. - Video manually plays, unmuted:
Select check box for controls, uncheck play, muted and loop.
Select “None” from pop up menu.
- Video autoplays, muted:
Step 2
Live Stream for Stream Conductor
- If your event has a live component being streamed to Eventfinity, create these before creating your Stream Conductor.
- If your event will have a live component sending RTMP to Eventfinity via an encoder, you will need a Livestream to catch that encode and put it into Stream Conductor.
- Create the Livestream
There are settings for latency when creating a new livestream. The default settings for latency is preferred. If you have interactive elements i.e. polling then Low Latency is suggested. - The onsite encoder tech will need two pieces of information from our Live Stream dashboard once created:
- RTMPS, this URL is the same for all Eventfinity Livestreams created in dashboard:
rtmps://global-live.mux.com:443/app - Stream Key, unique for each livestream created in dashboard: Select Show Stream Key or Copy to Clipboard.
- RTMPS, this URL is the same for all Eventfinity Livestreams created in dashboard:

Notes-
- Live Stream’s created in dashboard are on MUX, our primary CDN.
- If a backup CDN is required, Technical Services can provide the necessary info.
Step 3
Video Config for External or Client Provided Live Stream CDNs
- External Live Stream links i.e. Vimeo or Amazon’s IVS can be added to Stream Conductor in one of two ways:
- Added to dashboard as a playlist, known as an .m3u8 file. This file will come from the client’s CDN.
- Added as a Video Source in Video Configs
- Added to dashboard as an iFrame embed link This iFrame will come from the client’s CDN.
- Added as an external link in Content Assets
- There are two sets of options in Video Config for how the video is suggested to play are available.
- Check boxes to set video preferences.
- Pop up menu for Video JS commands.
- You will want to set both in tandem for the best possibility of it working with most browsers.
Please know that the attendee’s browser settings can override any of the below preferences. - Two most common video player options are:
- Video autoplays, muted:
Select check boxes for autoplay, muted and controls, uncheck loop.
Select menu option “muted - will call video element and manually call play on loadstart” from pop up menu. - Video manually plays, unmuted:
Select check box for controls, uncheck play, muted and loop.
Select “None” from pop up menu.
- Video autoplays, muted:
Step 4
Add Stream Conductor
- Create your Stream Conductor.
- You are now ready to Add Presentables!

- Presentable Best Practice, consider adding assets in the order they will be used. i.e. Opening Slate, then Primary Livestream, then closing slate, then backup livestream.
Notes:
- Assets and Livestreams can be added using Attach Presentables.
- If you have more than one stage, each with different content then a Stream Conductor per mainstage is needed.
Step 5
Create Main Stage and Attach
- Create your Main Stage.
- Once created, attach the Stream Conductor for this Mainstage.

- Reminder:
- Only one Stream Conductor can be attached to a Main Stage.
- Each Stream Conductor can have more than one Main Stage attached to it assuming each of the attached Main Stages will receive identical content.
Step 6
Operating Stream Conductor
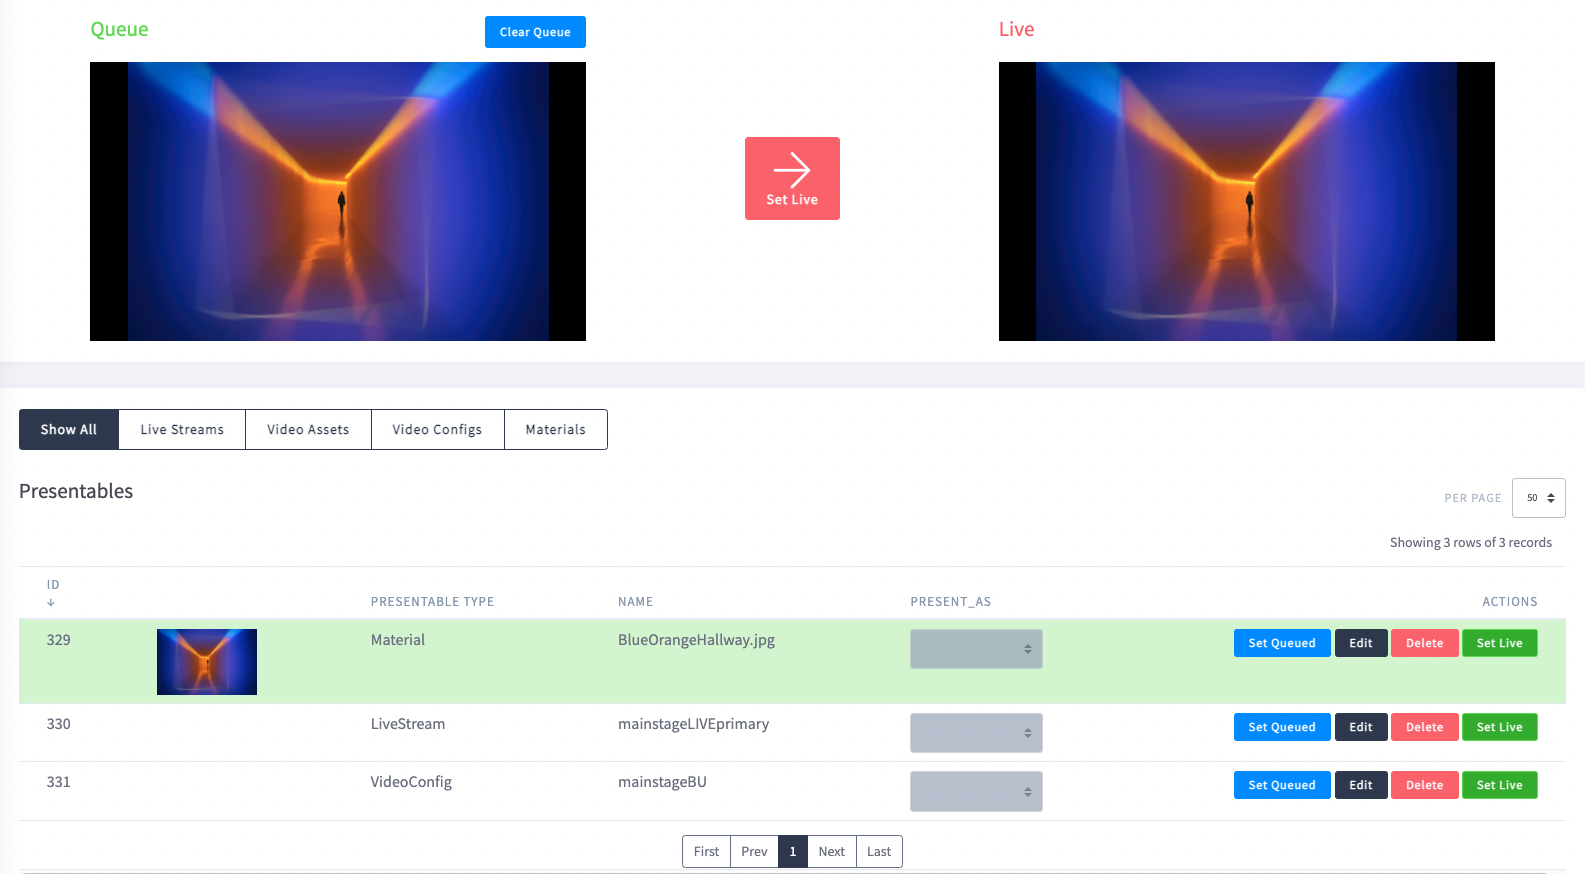
- Left Panel labeled QUEUE is your PREVIEW.
- Right panel is LIVE to the audience.
- Best Practice:
Set a broadcast slate to LIVE prior to opening the event to the audience. This in effect closes the curtains on the broadcast prior to start. - To start the show:
- QUEUE the live element i.e. video or livestream.
- When everyone is ready, Set LIVE to push the livestream to attendees.
- The QUEUE panel is useful for confirming the livestream is up and running. From the Queue panel you can watch and listen to the livestream coming from on site.

