Registration Forms Quick Start
Registration Forms help collect data from the event attendees. Mulitple forms can be created and each can be tailored to the events needs.
To create a new Registration Form, on dashboard go to Forms > Registration Forms
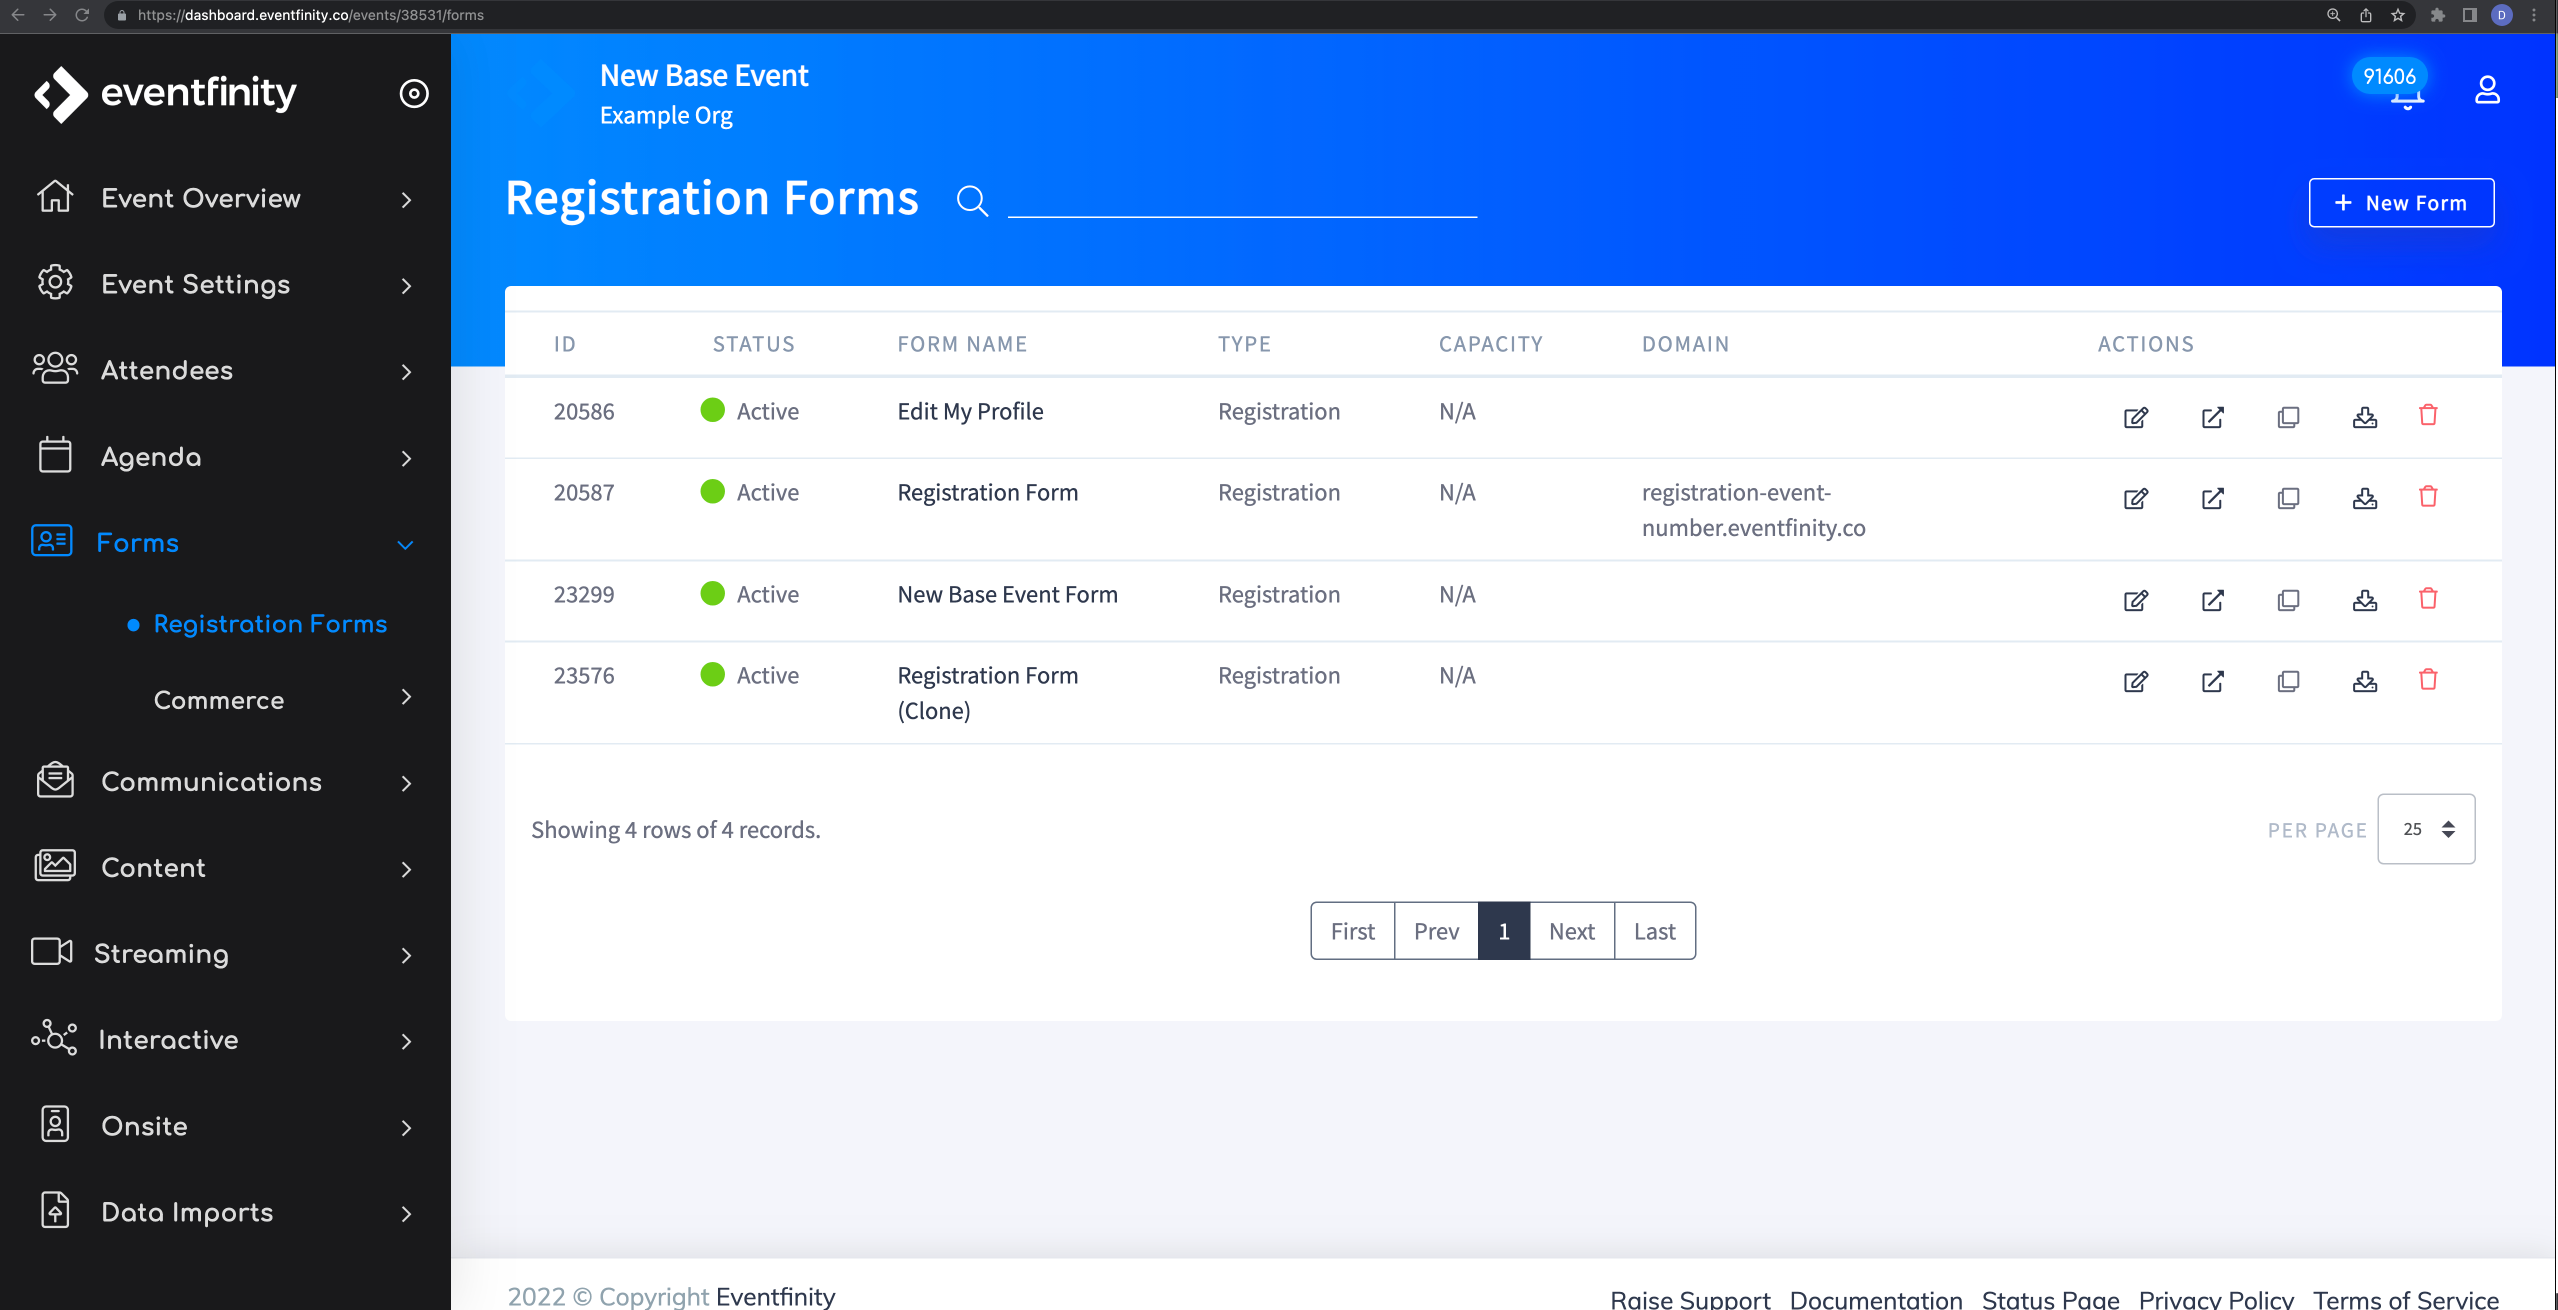
Click the +New Form" button at the top of the page.

(If you need to edit an existing form, click the edit icon to the corresponding form which will all be listed in this section.)

Then, update the form name and complete all the items in the "Form Detail" tab. Here you can provide a description, edit the messaging, and set options on when the form is active.
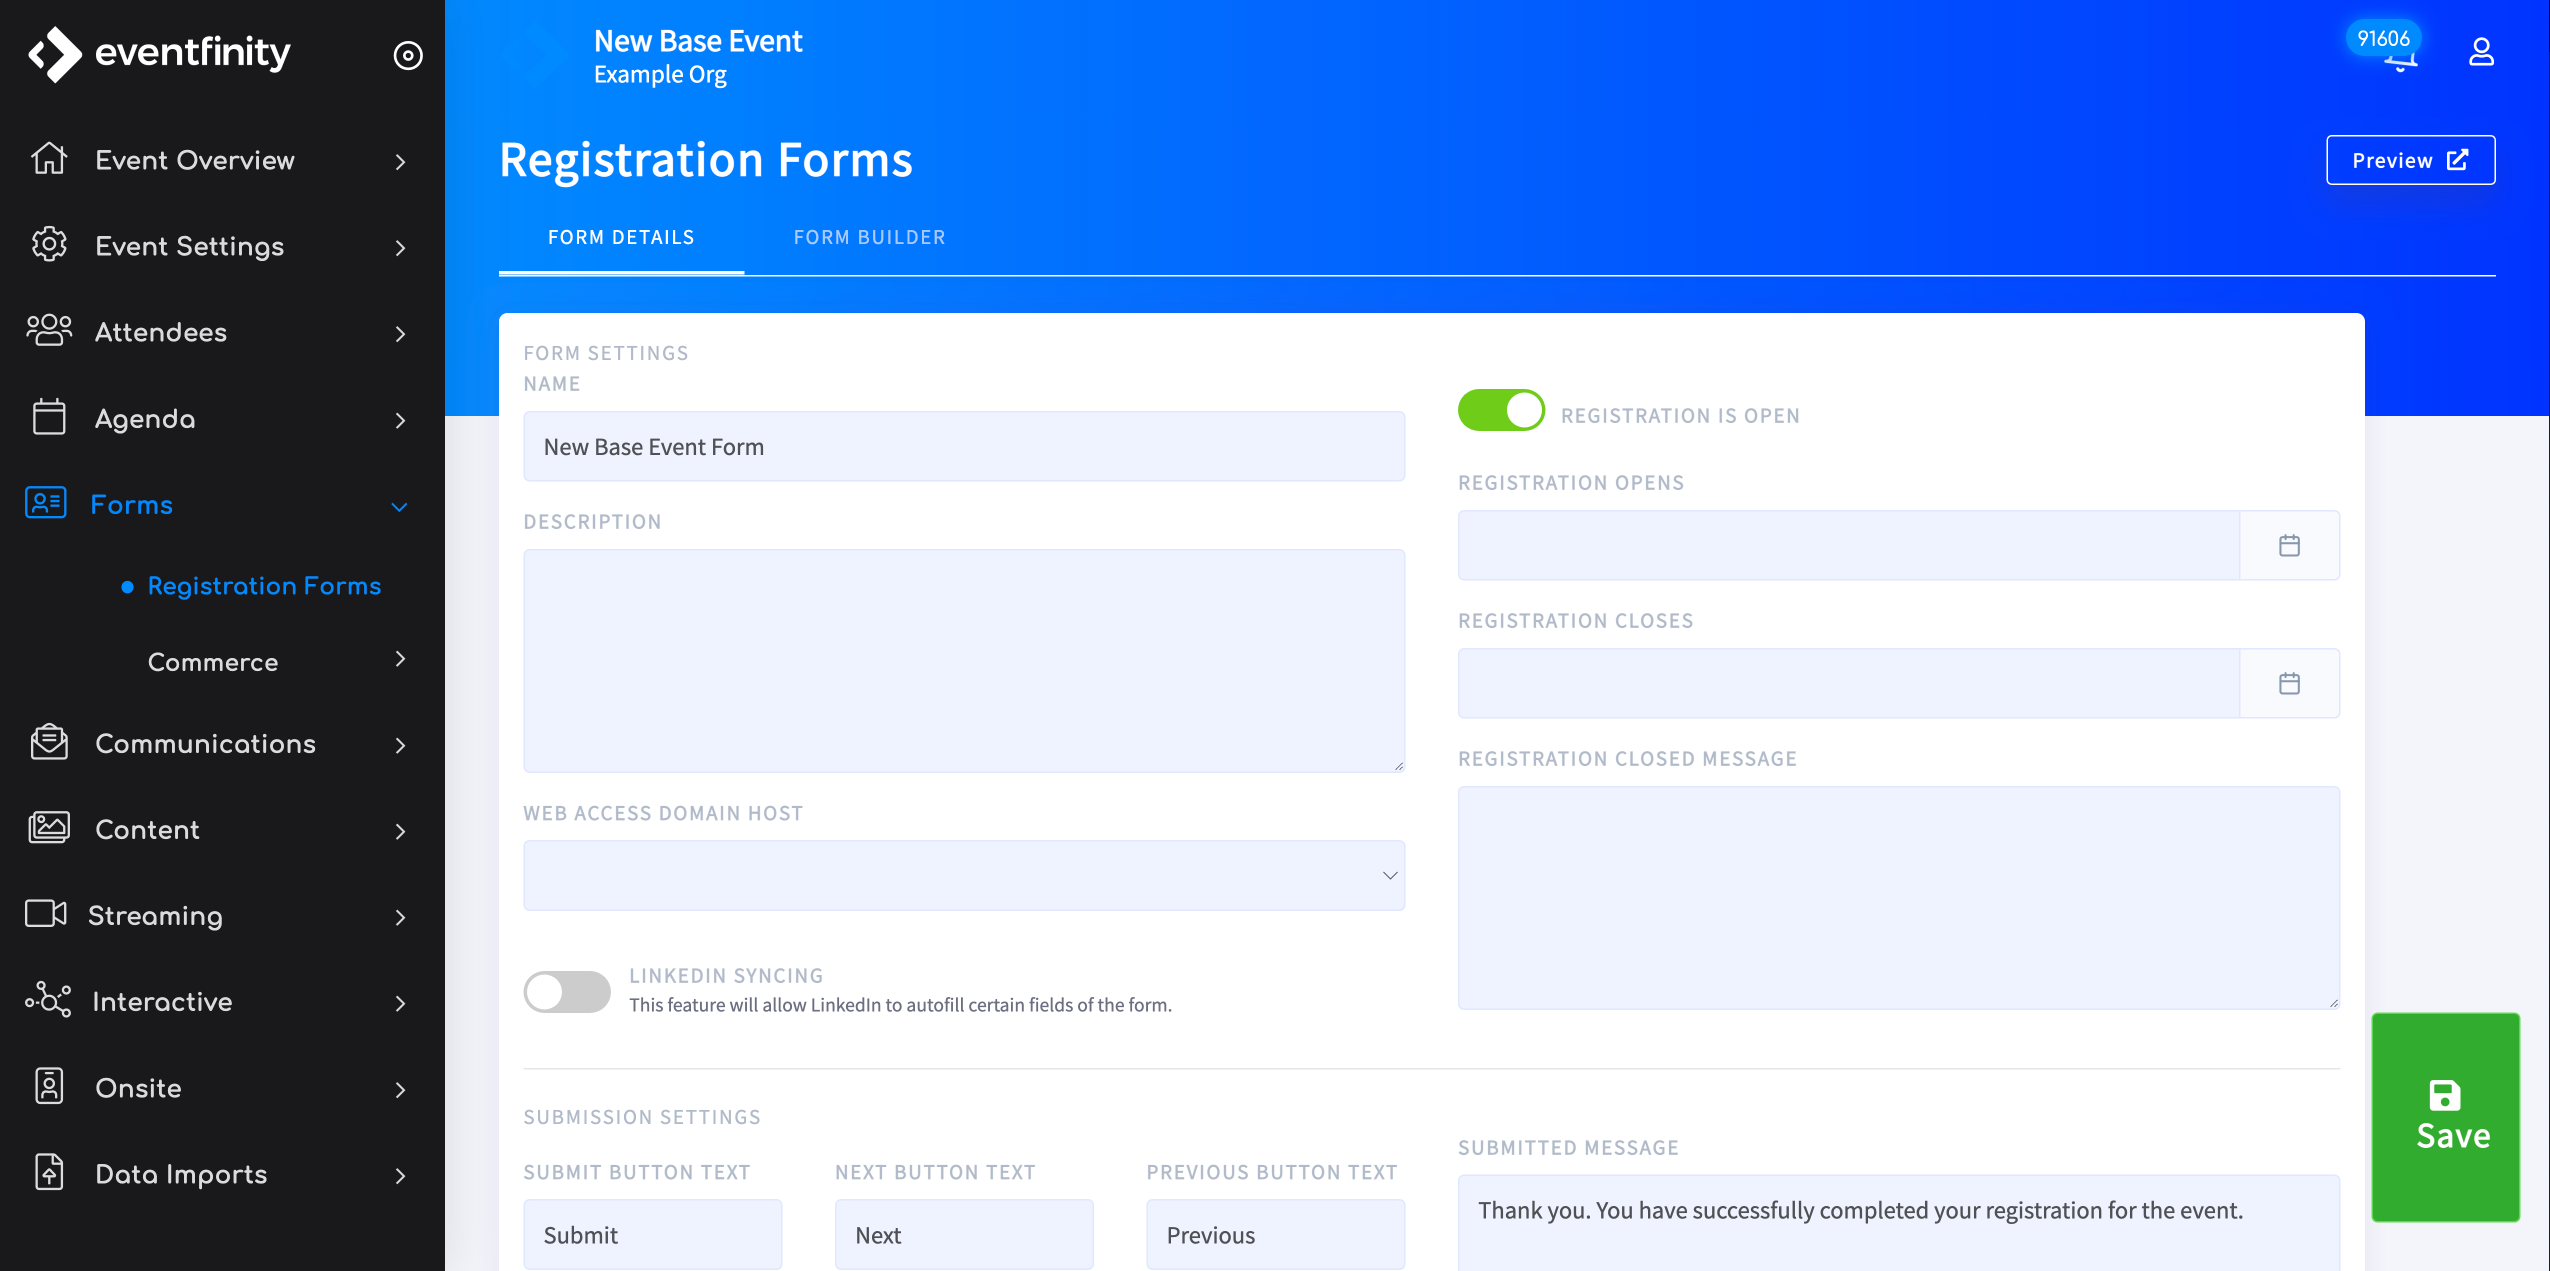
When you are finished on this page be sure to hit the save button before continuing.

The first time this is clicked, a template wizard will apear with 4 prebuild form templates.

- Simple
- A single-page form with the basic attendee fields (email, first, last, etc)
- Blank
- A fresh slate to start from.
- Advanced
- A 3 tabbed form that has 2 tabs collection information with the last tab setup to allow a final review of answers prior to submitting
- Exhibit Booth
- This template is built to help collect content and assets for Exhibit booths. The fields collected in this form are also used in the Exhibitor Directory Template.
For this article, we're going to select the Advanced option.
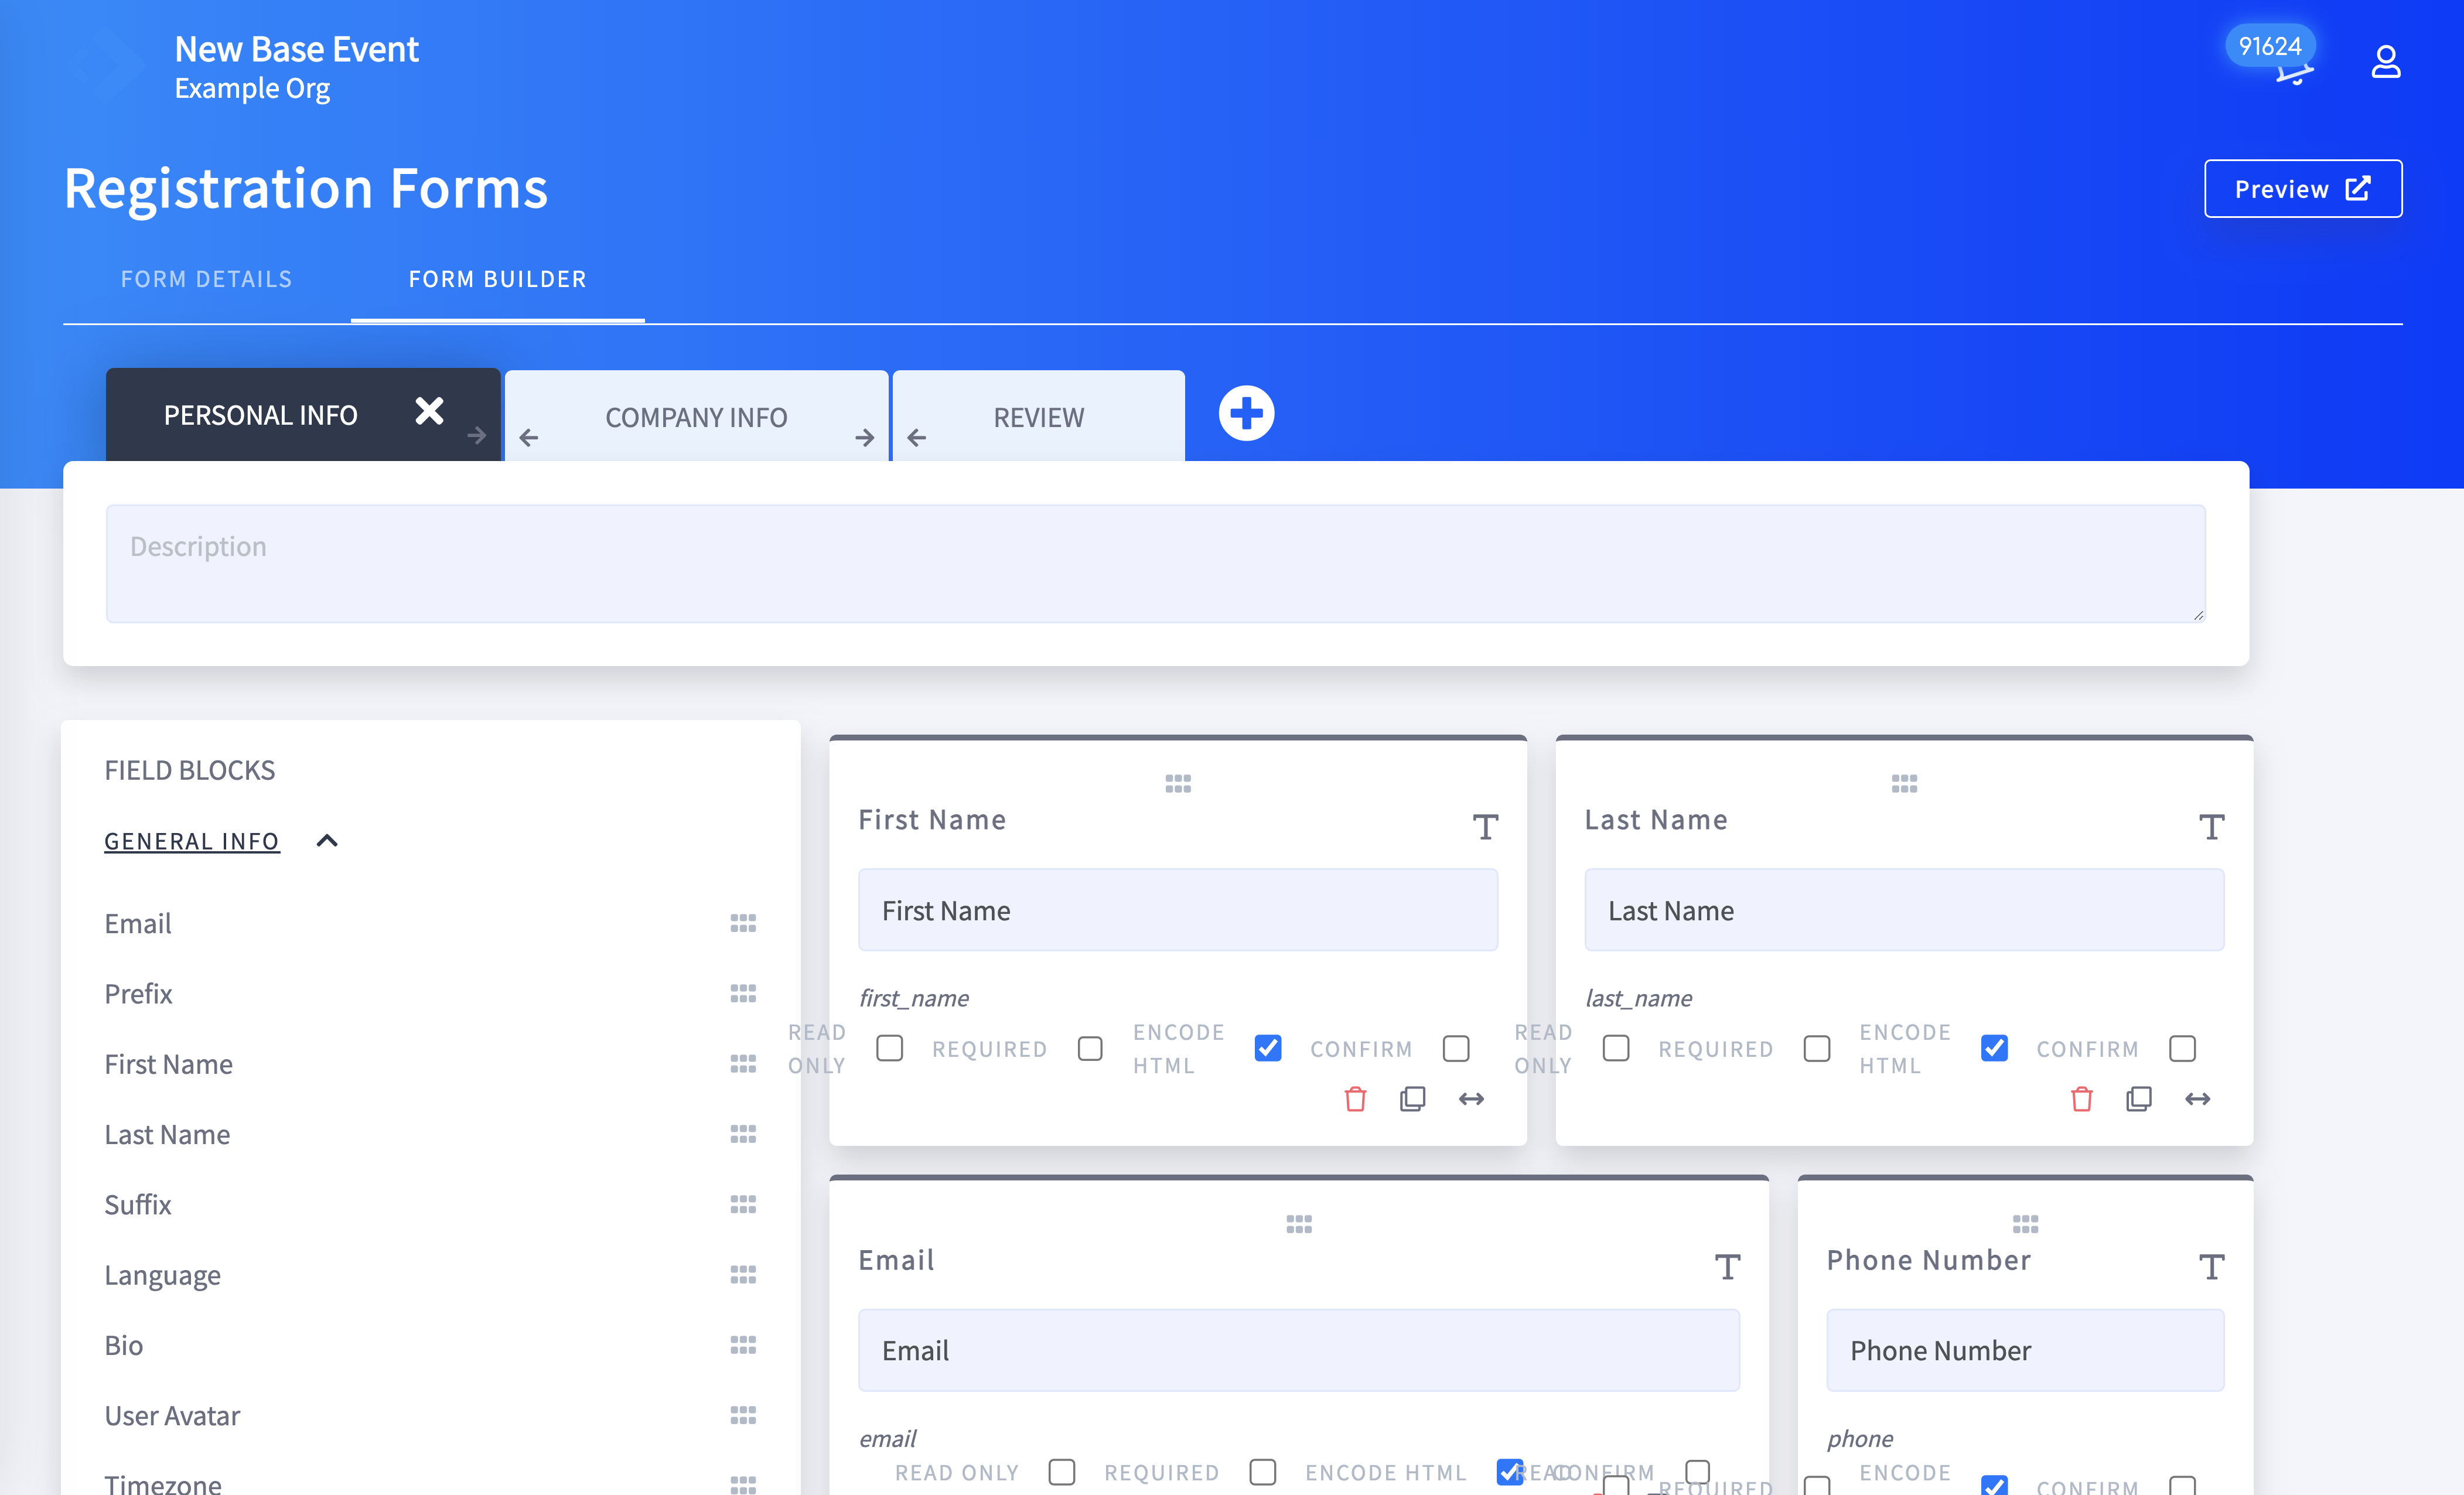
On the left-side are all the avaible Field Blocks that can be used on the form. To use one, drag and drop it from the Field Block section where you'd like the field to appear on the form.
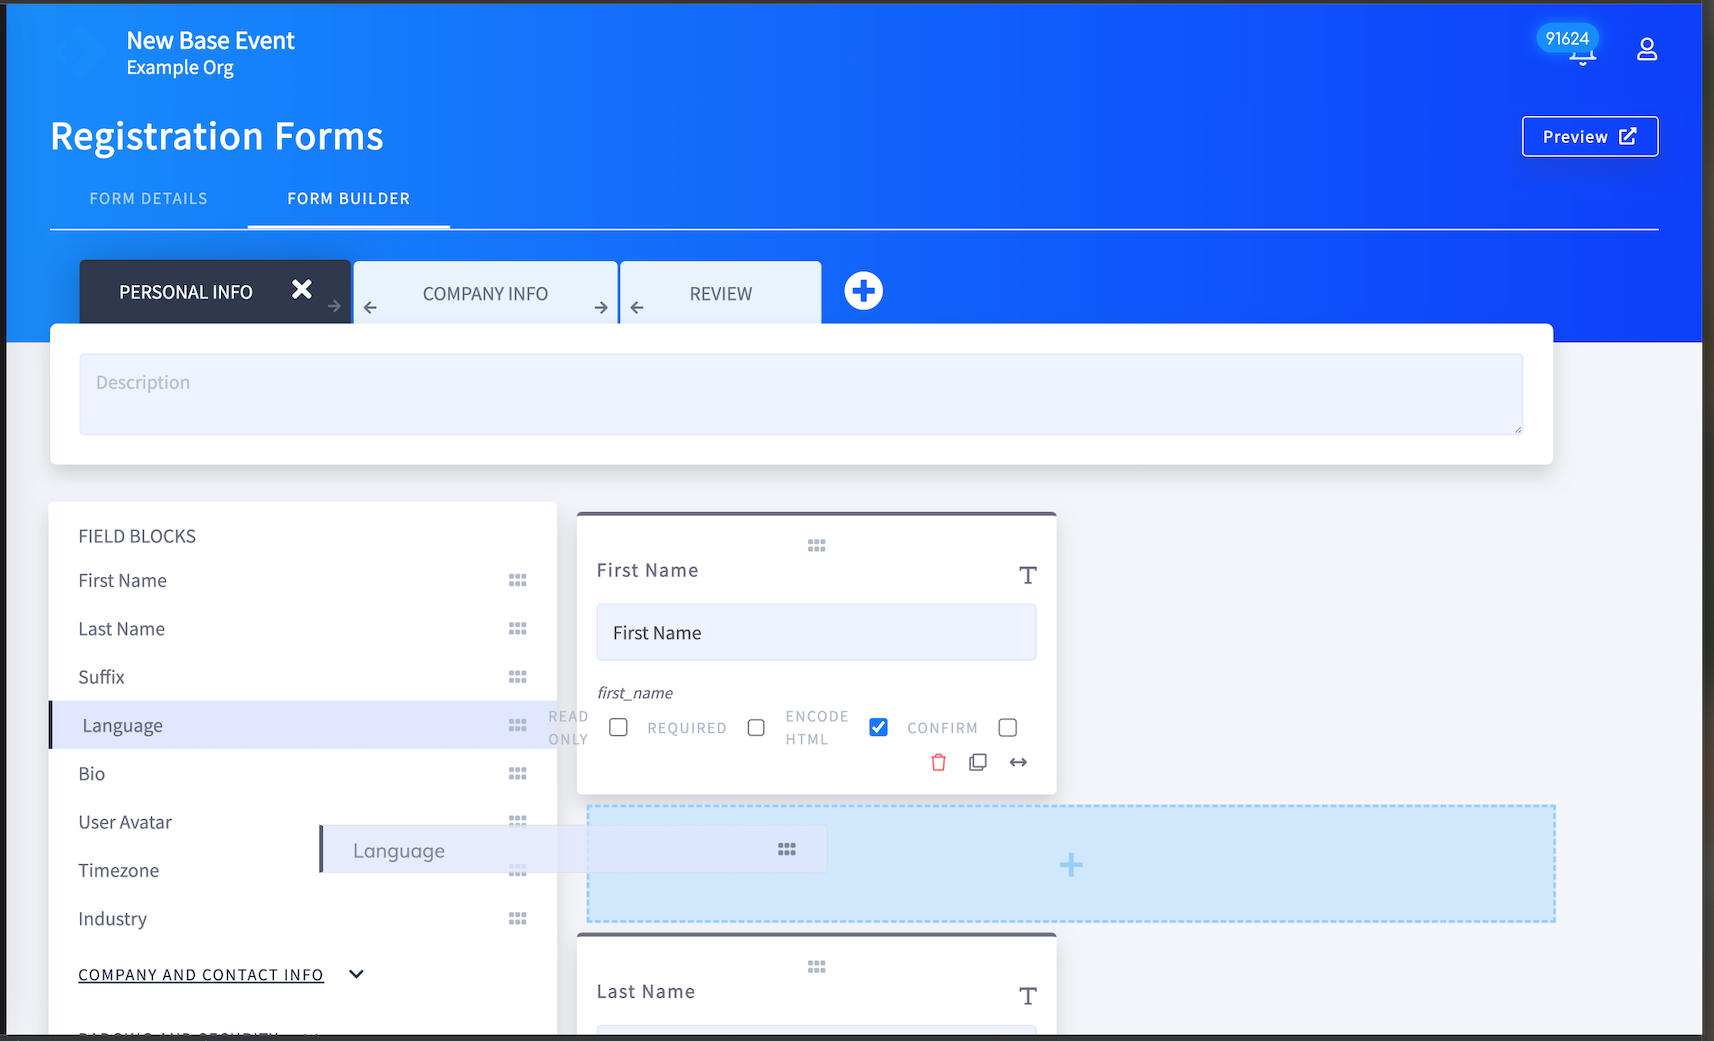
Above, shows the "Language" field block being dragged to be between the First Name and Last Name Blocks that are already on the form.