Registration Email Basics
There are a few different types of emails that can be sent from Eventfinity. This article will cover two different registration emails - invites and confirmations.
Registration Invitation Email
This email can be sent when you add (or import) a new attendee and set their registration_status field to be "NEW". This would be the "Attende Status Change" type of email which is explained below. These invitations can also be sent out to all right away using "Send Immediately."
Steps
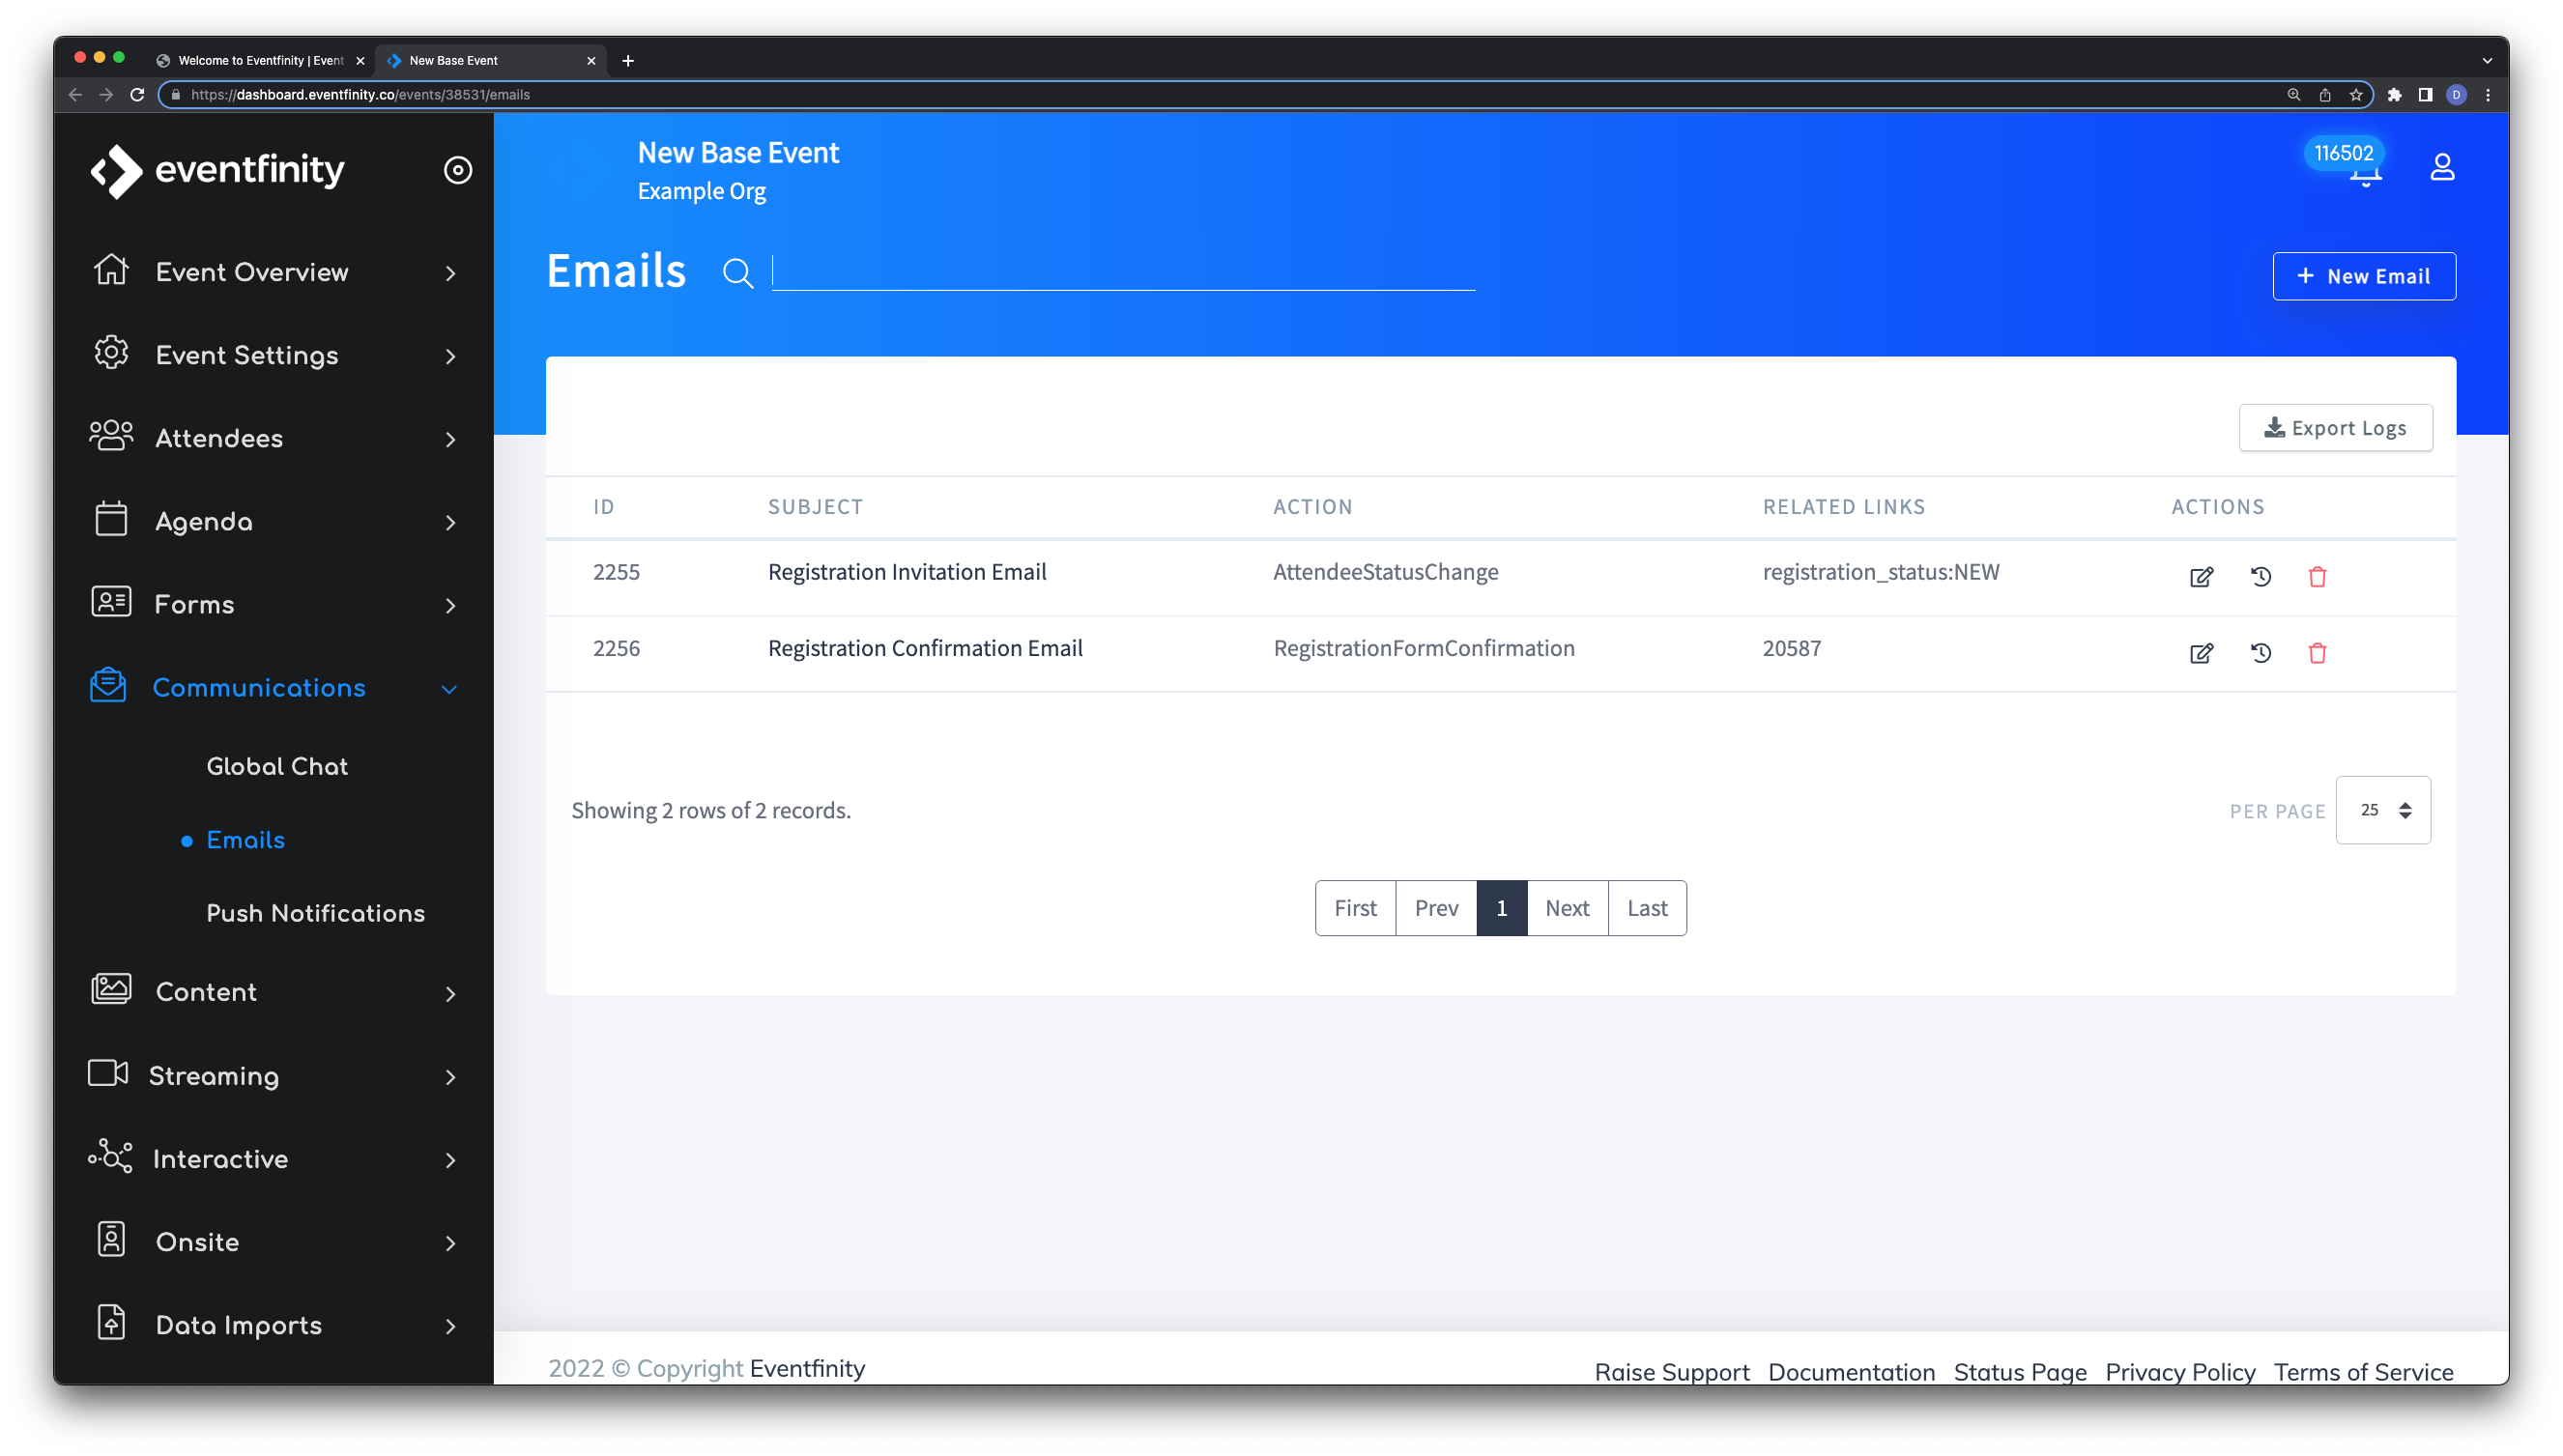
To Setup this type of email, on Dashboard go to Communications > Emails.

In the screenshot above, we've already setup this and the confirmation type of email. However, to create a new one for your event, click the "+ New Email" button on the top right.

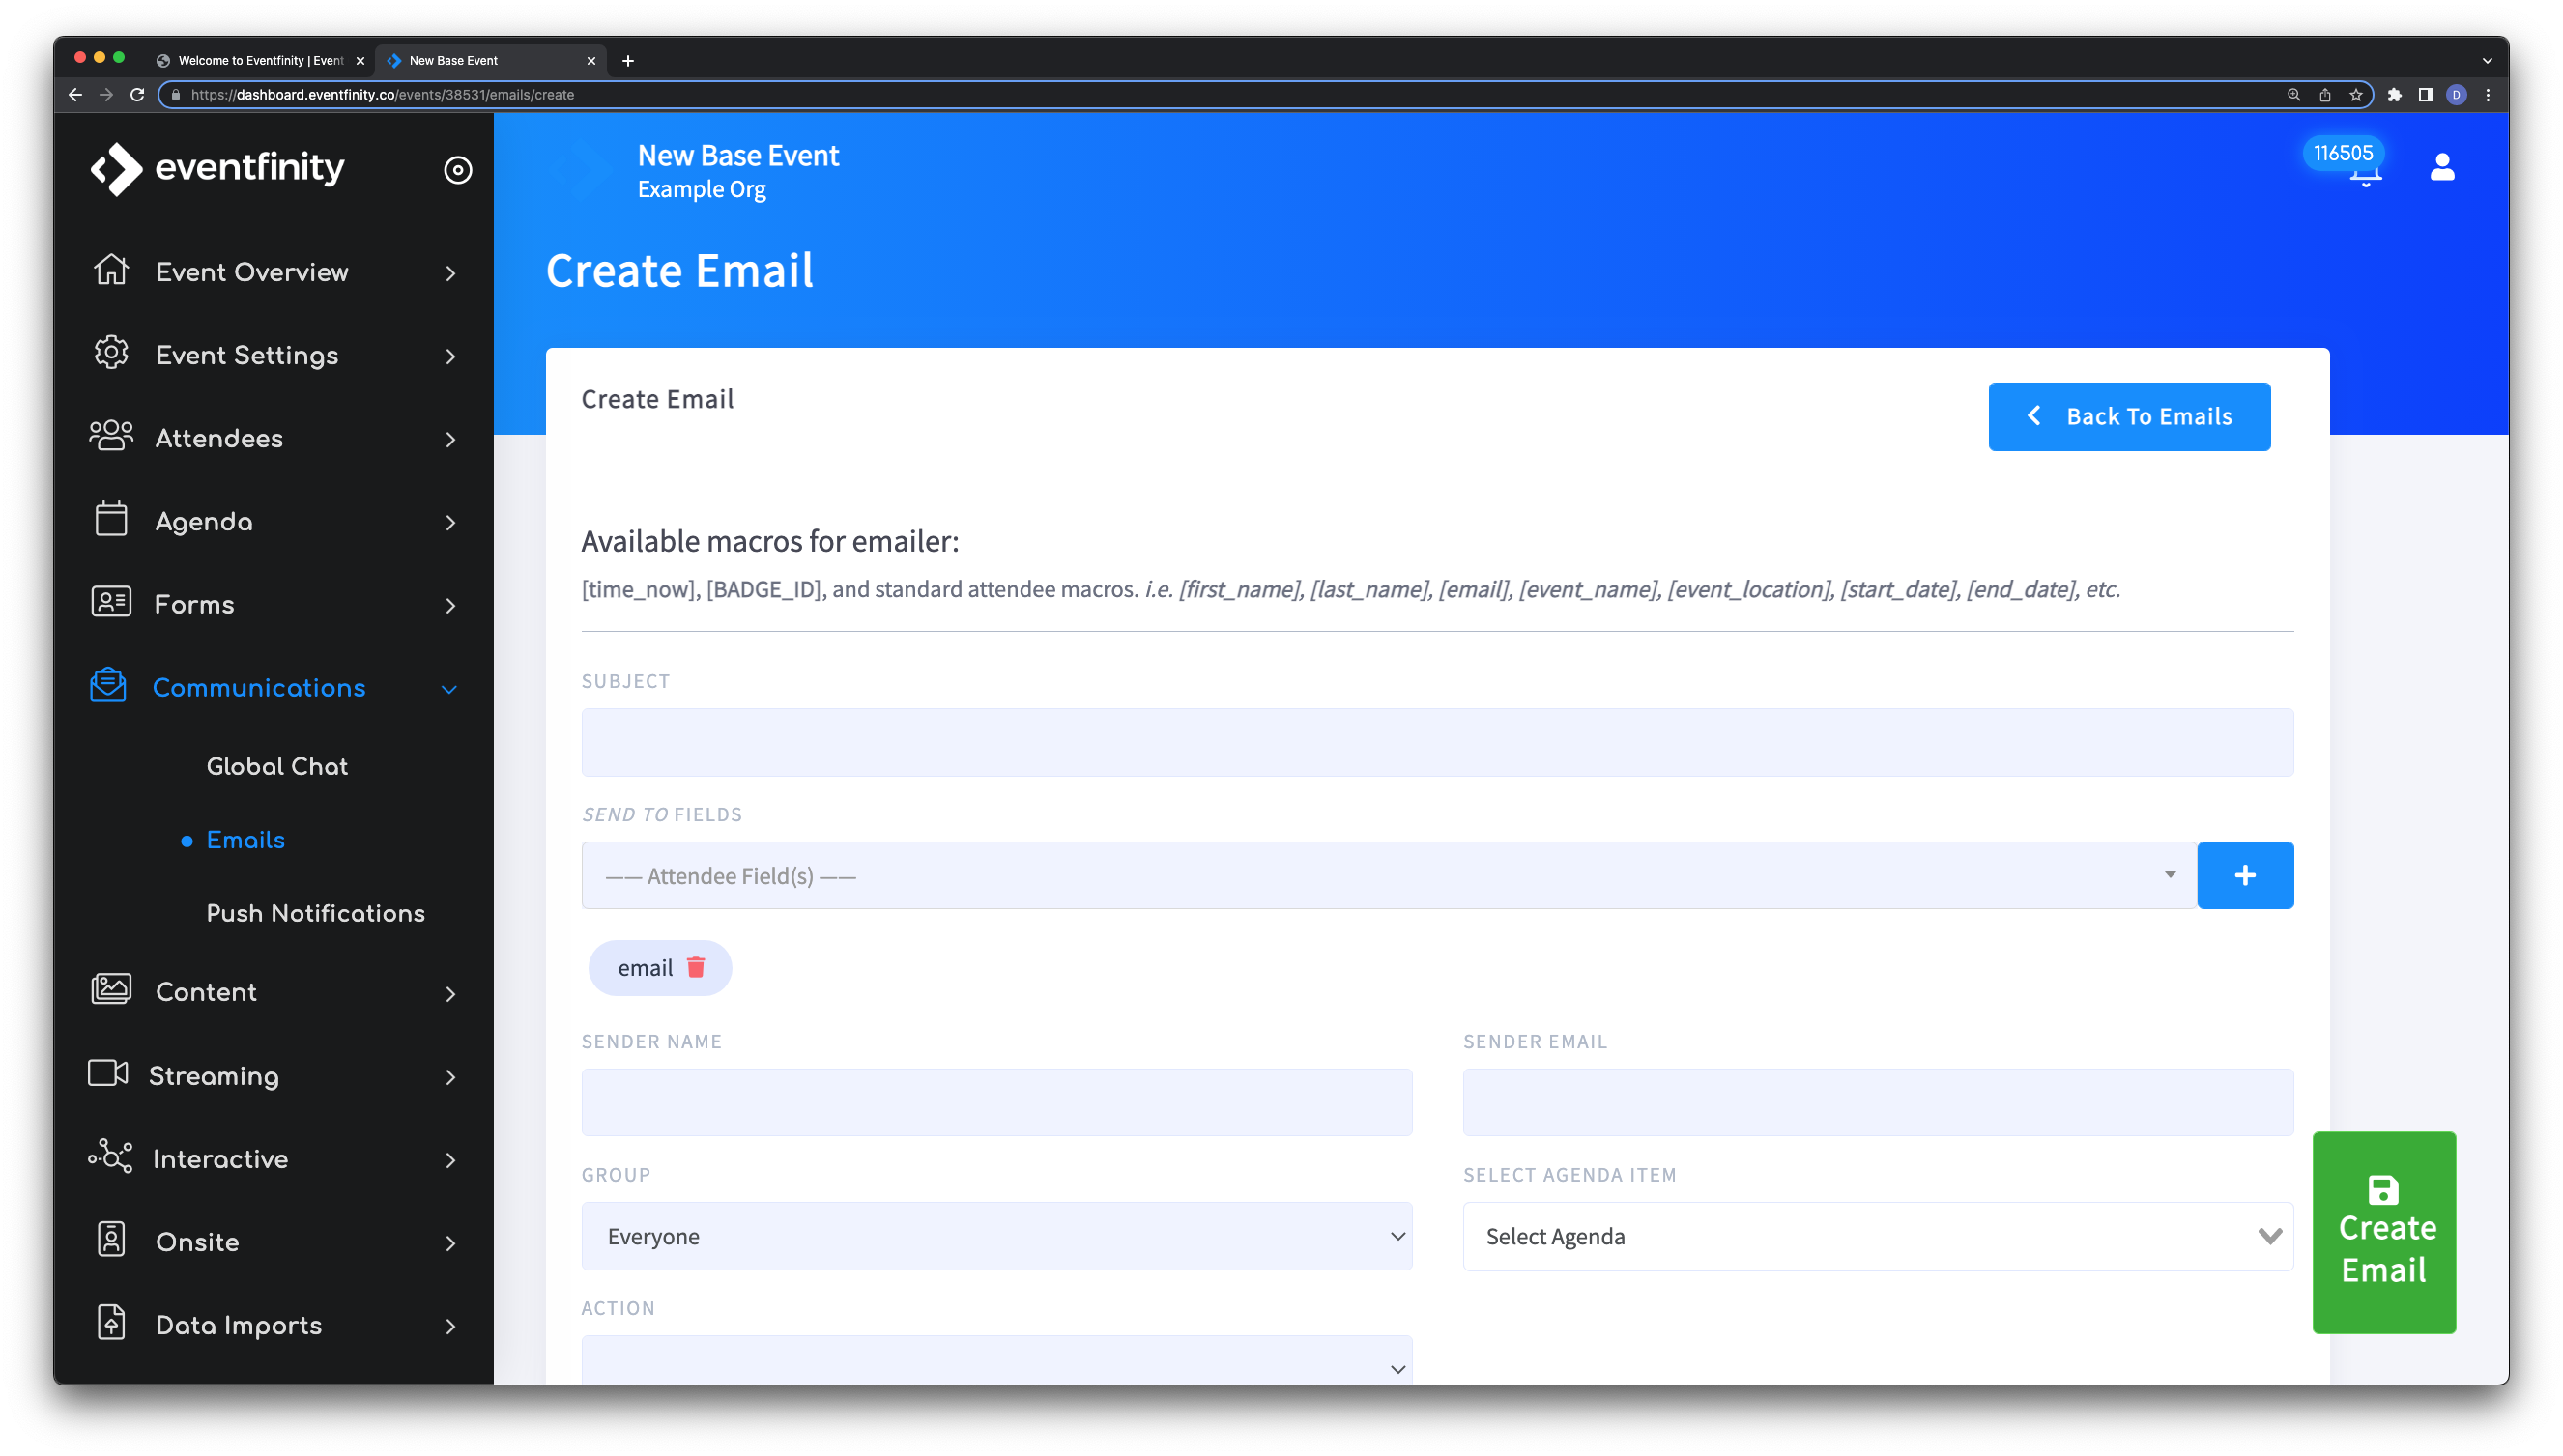
After clicking this button, you'll be directed to a new page to Create Email.

Here on this page, admins can customize the email. Fill in the fields for:
- SUBJECT - This is the email subject that will be seen by the recipient.
- SEND TO FIELD - This is typically the email address of the attendee but, we leave this customizable incase there is a prefered email address or multipule email addresses. Example, an admin or group lead's email. Note- this is defualted to be "email" so if this is not desired, you will have to delete this field and select a different one.
- SENDER NAME - This is to provide the name of the Sender of the communication. It could be a company name or anything that's desired. This does not have to be an attendee within the system.
- SENDER EMAIL - This is also to provide information on the Sender of the communication. This email address does not have to be real. We suggest if it isn't something like a "noreply" address be used here. Example - "GramercyTech@DoNotReply.com". Note- the only requirement is that it has an email address format. Also, if a real email address is utilized, recepients can reply back to the real email address used.
- GROUP - Emails are sent out using groups and there is 1 option to send to Everyone.
- SELECT AGENDA ITEM - This is not a required option and likely not used for Registration type of emails. What this does for other types of emails is it attaches a link to a specified Agenda item from that event. The Attendee would need to have access to this event and agenda item to access it. This is useful to send meeting communications. Eample - "Don't miss the special event starting this Sunday at 1pm to 2pm". Then attach the agenda item that is for this session. The attendee that recieves the email will be able to click the link and go right to that agenda item. These agenda items would need to be in the event in order to select it.
- ACTION - There are 4 selections for action. Action is the action taken for the email when we comlete this and create the email. The 4 options are listed below but, the ones to use to create a Invitation to Registrer would be the 2nd or 3rd one. "Attendee Status Change" or "Send Immediately". However, if you're just creating a draft of this email and not ready to send, we can set it to the 4th option "Generic Template" which will save the email to be used later.
- Registration Form Confirmation (Furher explanation below)
- Attendee Status Change
- Send Immediately
- Generic Template

- If Attendee Status Change is selected antoher option will apear to provide a Value that will trigger the email to be sent. Only when this value is used for the value of the selected ATTENDEE STATUS FIELD will it trigger the email.
- Send Secure Images - This is optional and doesn't currently work for Apple Mail.
- Most Importantly is the MESSAGE BODY - Here is where we can create the body of the email communication. HTML and short code (macros - [time_now], [BADGE_ID], and standard attendee macros. i.e. [first_name], [last_name], [email], [event_name], [event_location], [start_date], [end_date], etc.) can be utilized here.
- Once these fields are complete, you can press the green "Create Email" button on the bottom right.

Once this button is pressed you will be redirected back to the Communications > Email index page. Here you'll be able to see the logs of what was sent out as well as edit or delete the Email. To check the logs, press the log icon for the email in question. This is the clock with a counter-clockwise arrow circling the clock.
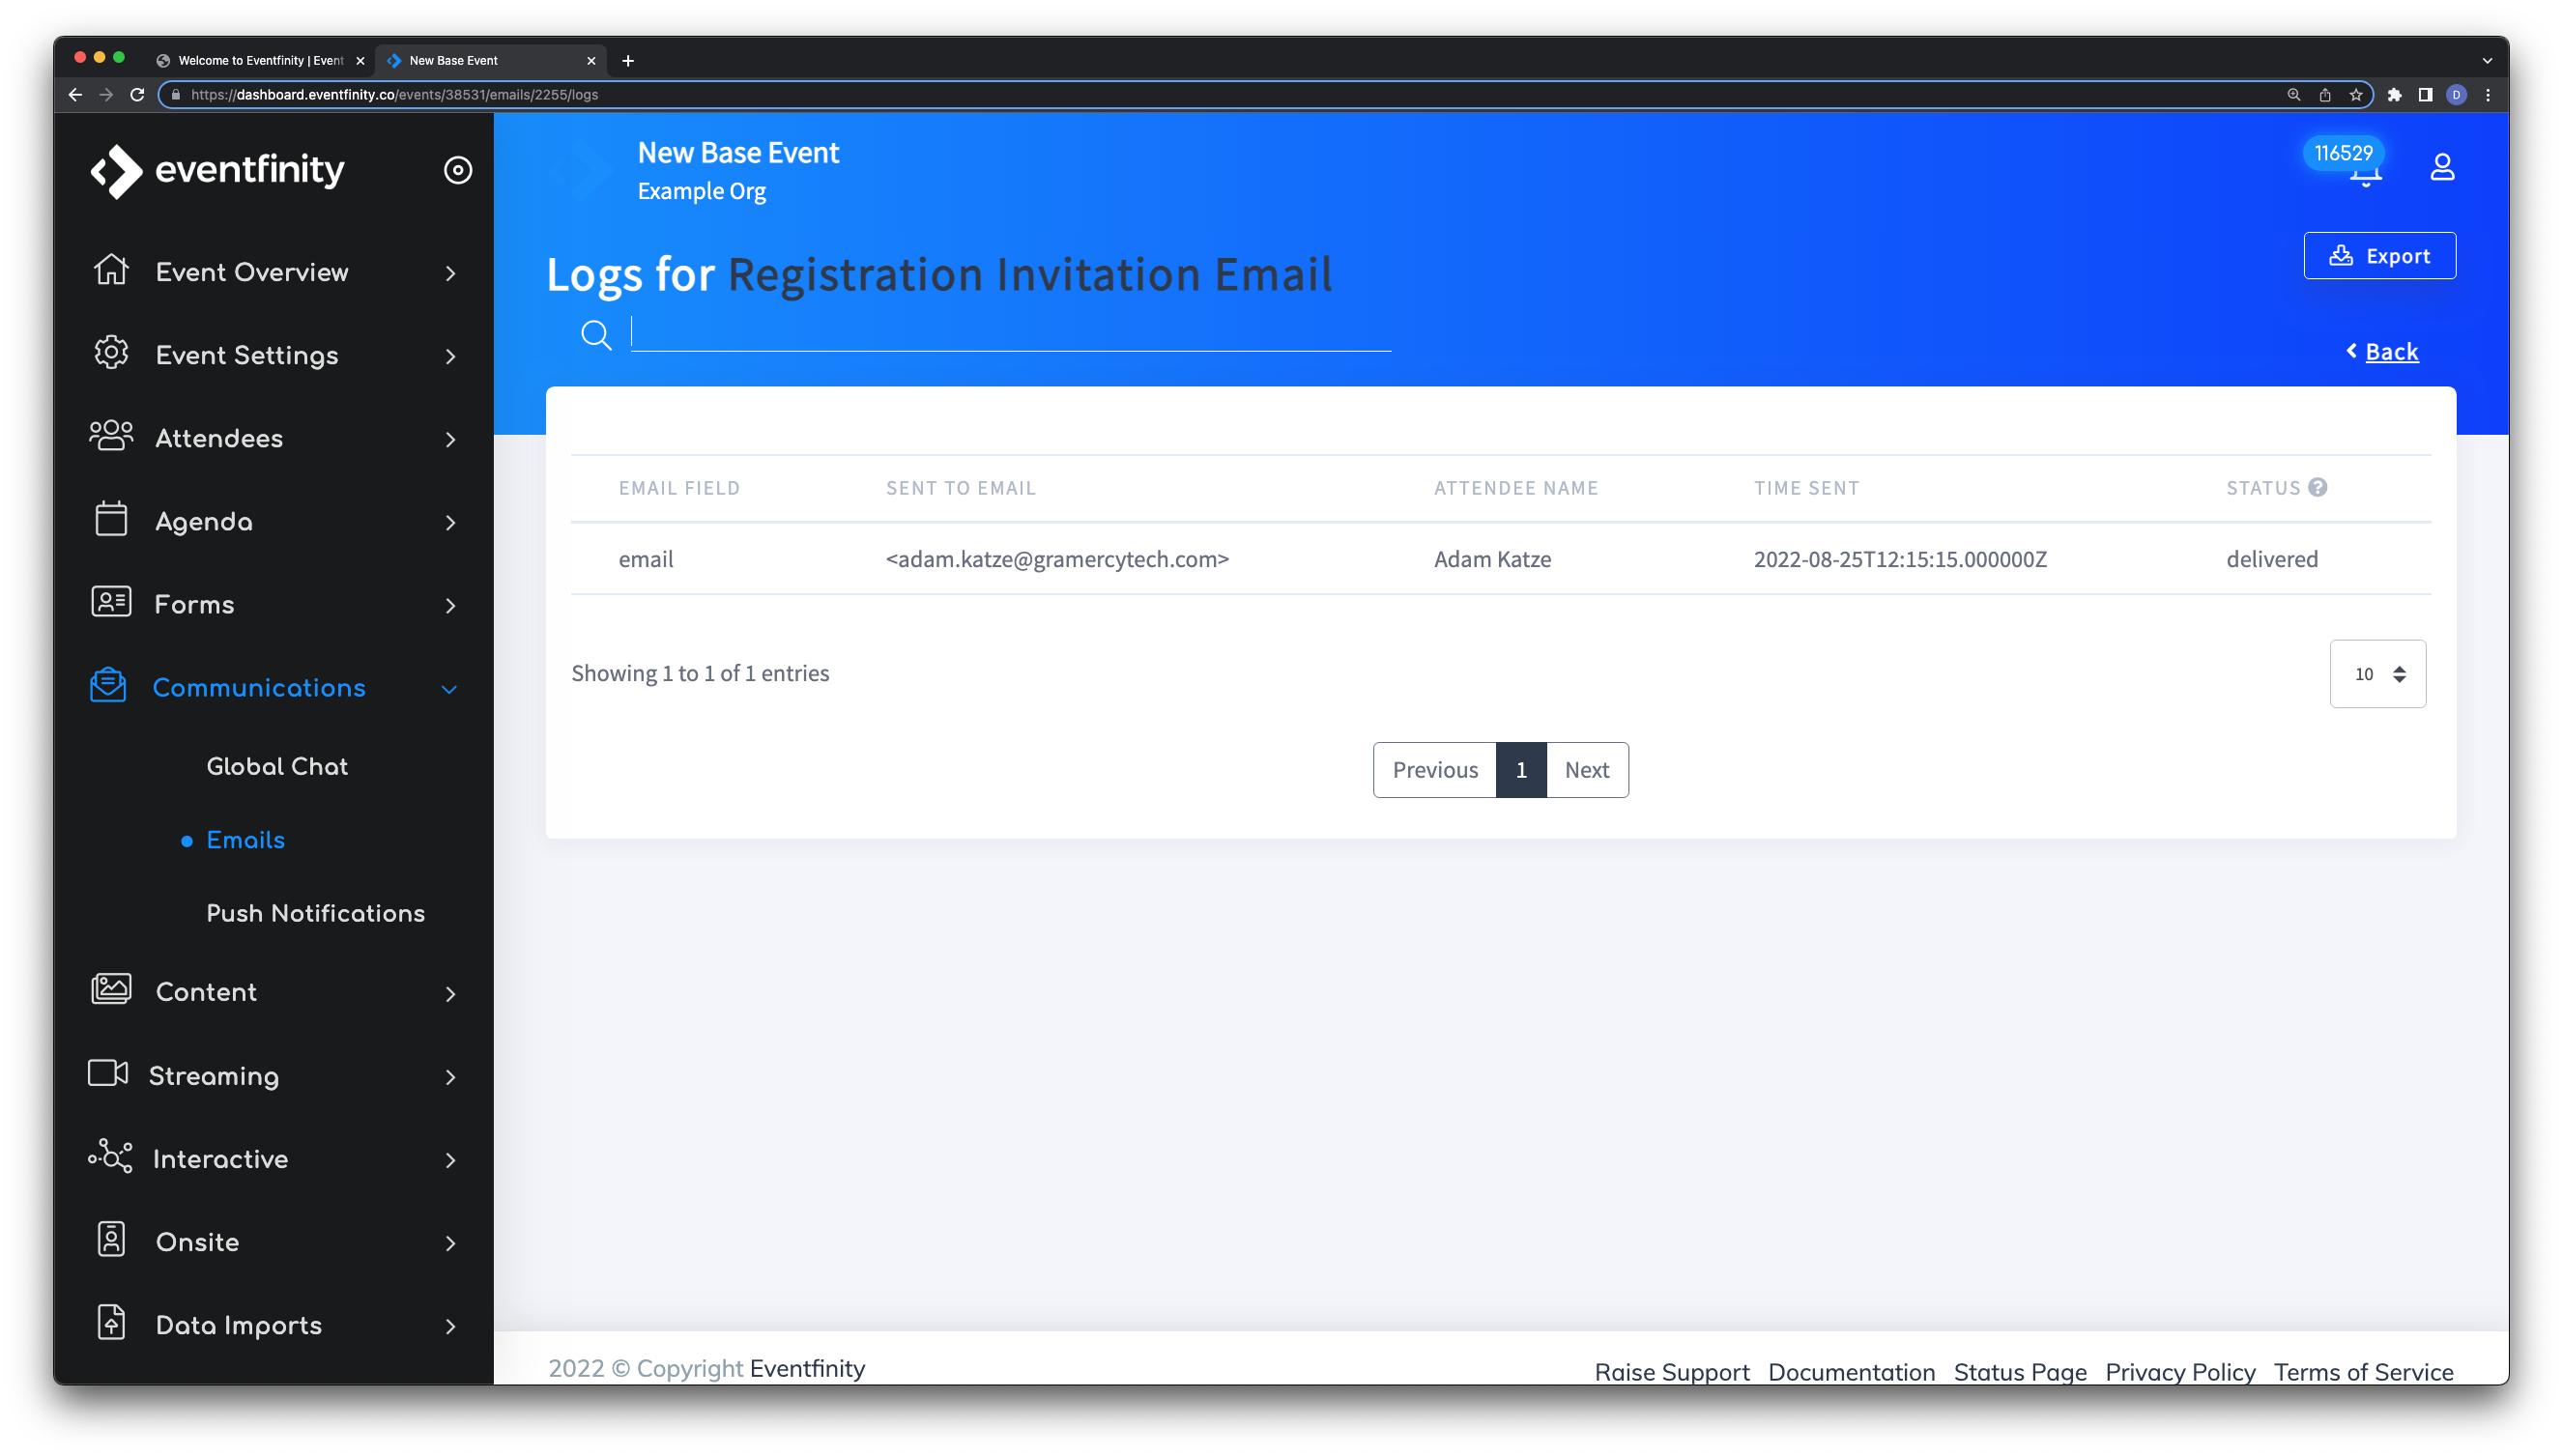
 Clicking "Logs" will bring you to a page showing a list of all emails sent out and a basic status of each.

In the above example, Adam Katz is the only one that an email was sent out to. Here shows what field was used as the emaill address, the email address of the reciever, the name, the date and time the communication was sent and the status. Here Adam Katz was sent this email to his Gramercy Tech address on 8/25 12:15pm and was sucessfully delivered.
Registration Confirmation Email
This email is sent as a confirmation when the registration form is submitted by the user.
All the steps to create this type of email is very similar to the above but, the ACTION should be set to "Registration Form Confirmation"
When this option is selected, an option to select a "FORM" will appear and need to be selected. Select the registration form that's desired here. Anyone completing this form will get this email.
