Creating an Eventfinity Live App Event and Android PWA
Overview
The Evenfinity Live companion app gives attendees of in-person, virtual, and hybrid events live access to the event they are attending. Events hosted by Eventfinity Live can provide event details, schedules, presenter and sponsor/exhibitor information, and support event interaction and networking.
For event producers, Eventfinity Live features include:
Create an event website and event app at the same time.
Events can scale to over 100,000 attendees.
Enterprise-grade back-end and app-level security.
Analytics reports on attendee engagement.
Drag-and-drop interface to set up your site’s navigation and home screen.
User-friendly content management system.
Who and Where?
Who can access? All Eventfinity Dashboard administrators can create an event app. The setup of an app is essentially the same process as creating a standard webview virtual event with several additional steps. For the purpose of this article, we will focus only on these additional steps.
Where is this found on Dash? The app setup is performed in the dashboard under the Event Settings Menu, under the Event URL, Event Theme, Navigation Editor, Service Workers, Barcodes and Web Manifest sections.
Step 1
Set up Event Info
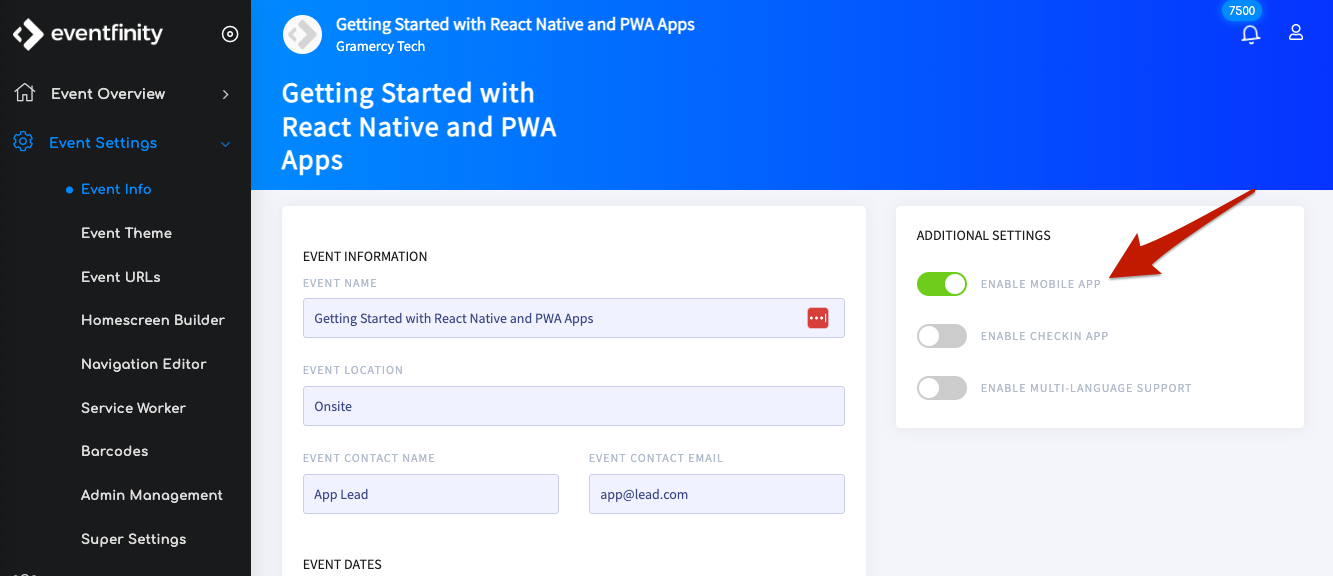
The first step is to toggle on the ENABLE MOBILE APP from the Event Info Screen
Step 2
Set up Event Theme - Mobile App
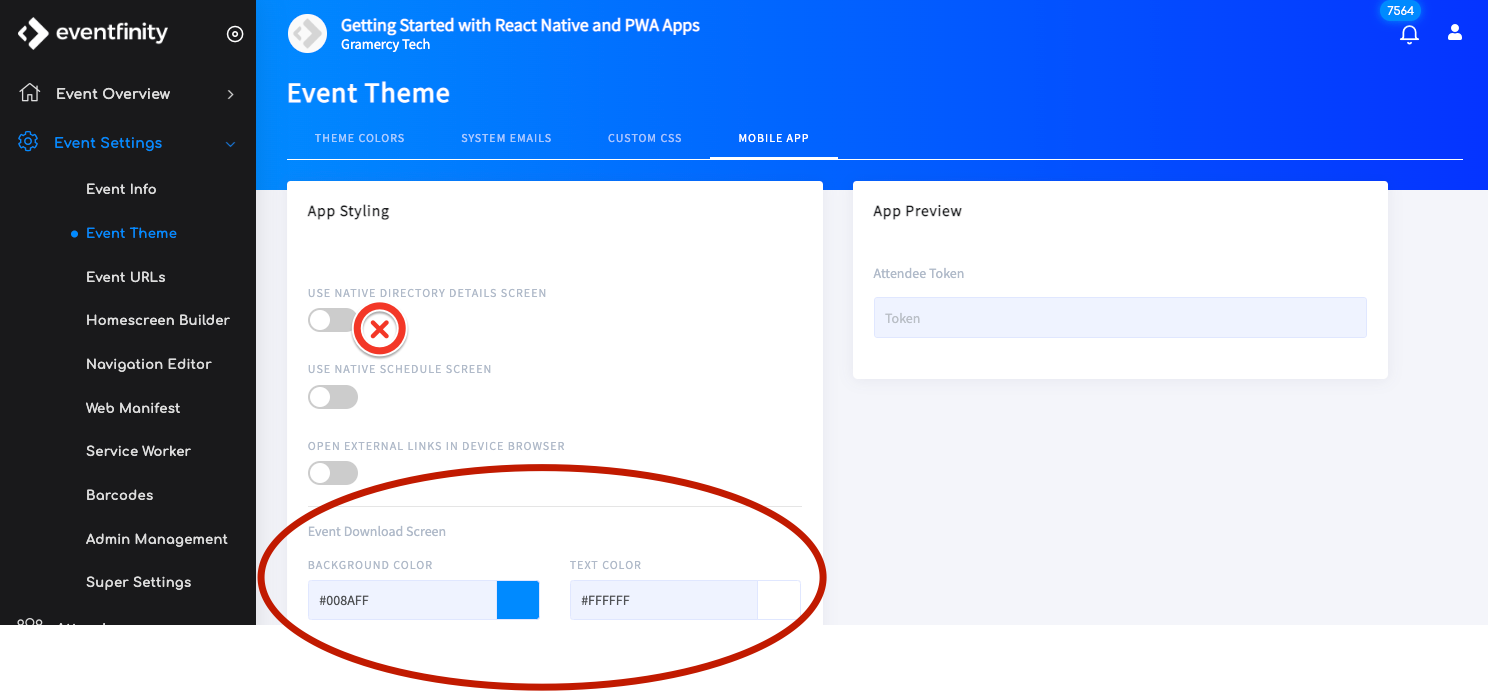
Toggle the native directory details screen off
Set your event download screen background and text color
Step 3
Set up Event URLs
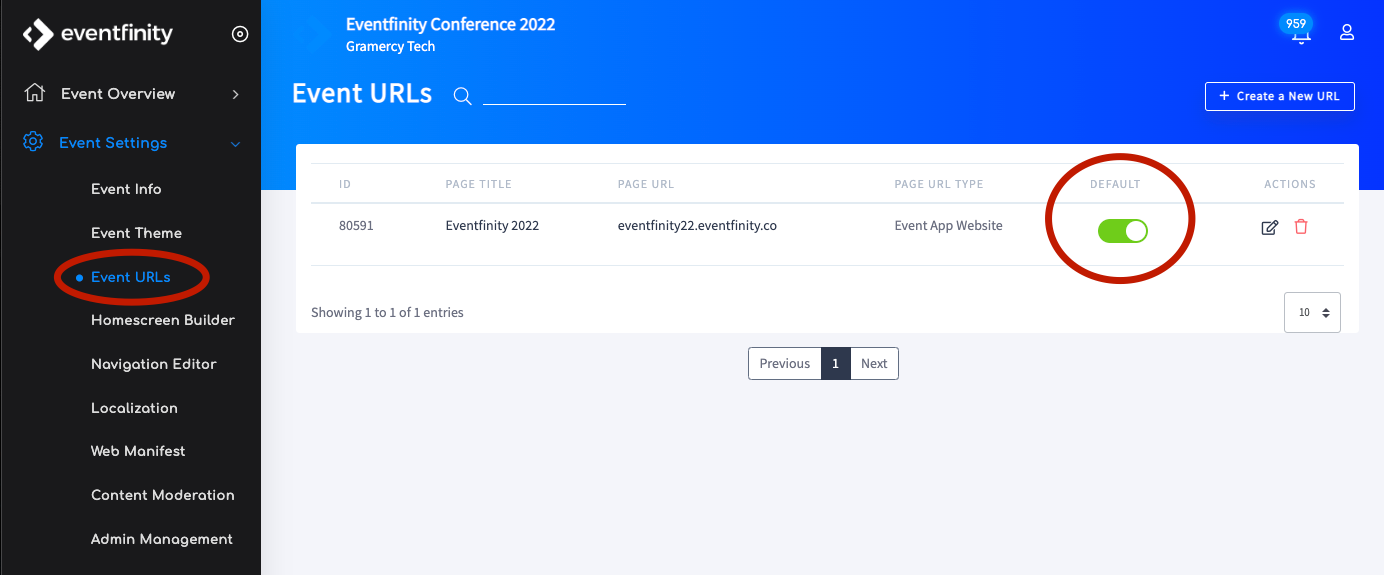
The next step is to create an Event App Website page URL and make sure it is toggled on as the default URL
After creating the URL, click the edit icon and select Advanced Settings to toggle on the Enable Progressive Web App (PWA)
Step 4
Set up the Web Manifest
The web app manifest is a file you create that tells the Android browser how you want your web content to display as an app in the operating system as a Progressive Web App (PWA).
- After toggling on the PWA you will now set up the Web Manifest by clicking on the Add Webmanifest button on the top of the page.
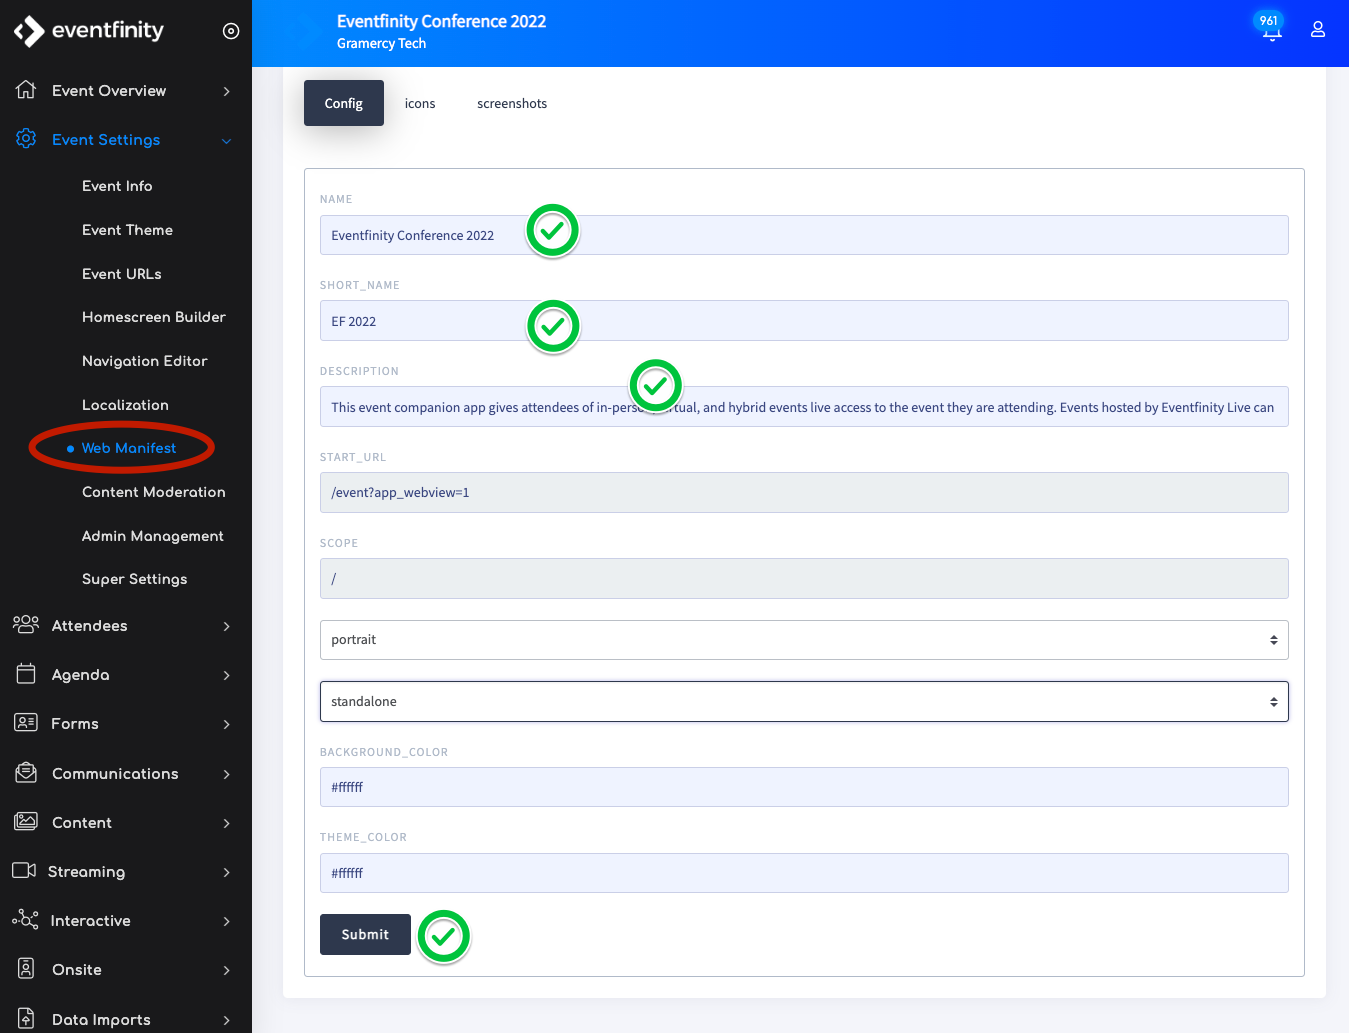
Next click the Config button and add:
The app NAME. It will appear along with the icon in the operating system's home screen, launcher, dock, or menu.
The app SHORT NAME. This will be the app icon label on the home screen. Event names longer than 13 characters will be truncated on the home screen.
Enter the app DESCRIPTION. This should describe the app and its intended purpose.
Example: Eventfinity Live gives attendees of virtual and hybrid events live access to the event they are attending. Eventfinity Live can provide event details, schedules, presenter and sponsor/exhibitor information, and support event interaction.
The theme color is the default color for the application, sometimes affecting how the OS displays the site (for instance, the window and title bar color on desktop, or the status bar color on mobile devices). This color can be overridden by the HTML theme-color <meta> element.
Leave the display modes in portrait and standalone.
The background color displays in the application’s background before its stylesheet is loaded. Safari on iOS and iPadOS and most desktop browsers currently ignore this field.
Click Submit and then on to icons.
- Go to the icons tab and select Add Icon
There are two icon image sizes needed for each device type and the images MUST be PNG file types.
NOTE: The images must be sized externally before uploading. Files are not resized in dashboard.Android requires both 512W x 512H and 192W x 192H icons.
The 512x512 icon is the icon that will display on the home screen. If there is not a 512x512 icon - the option to install the PWA will not be available in Chrome.
The 192x192 image is the icon that appears when a user searches for an app in the app drawer on their device.
iOS requires both a 180W x 180 H and 120W x 120H icons.
Use the Add Icon button to add the 2 icons
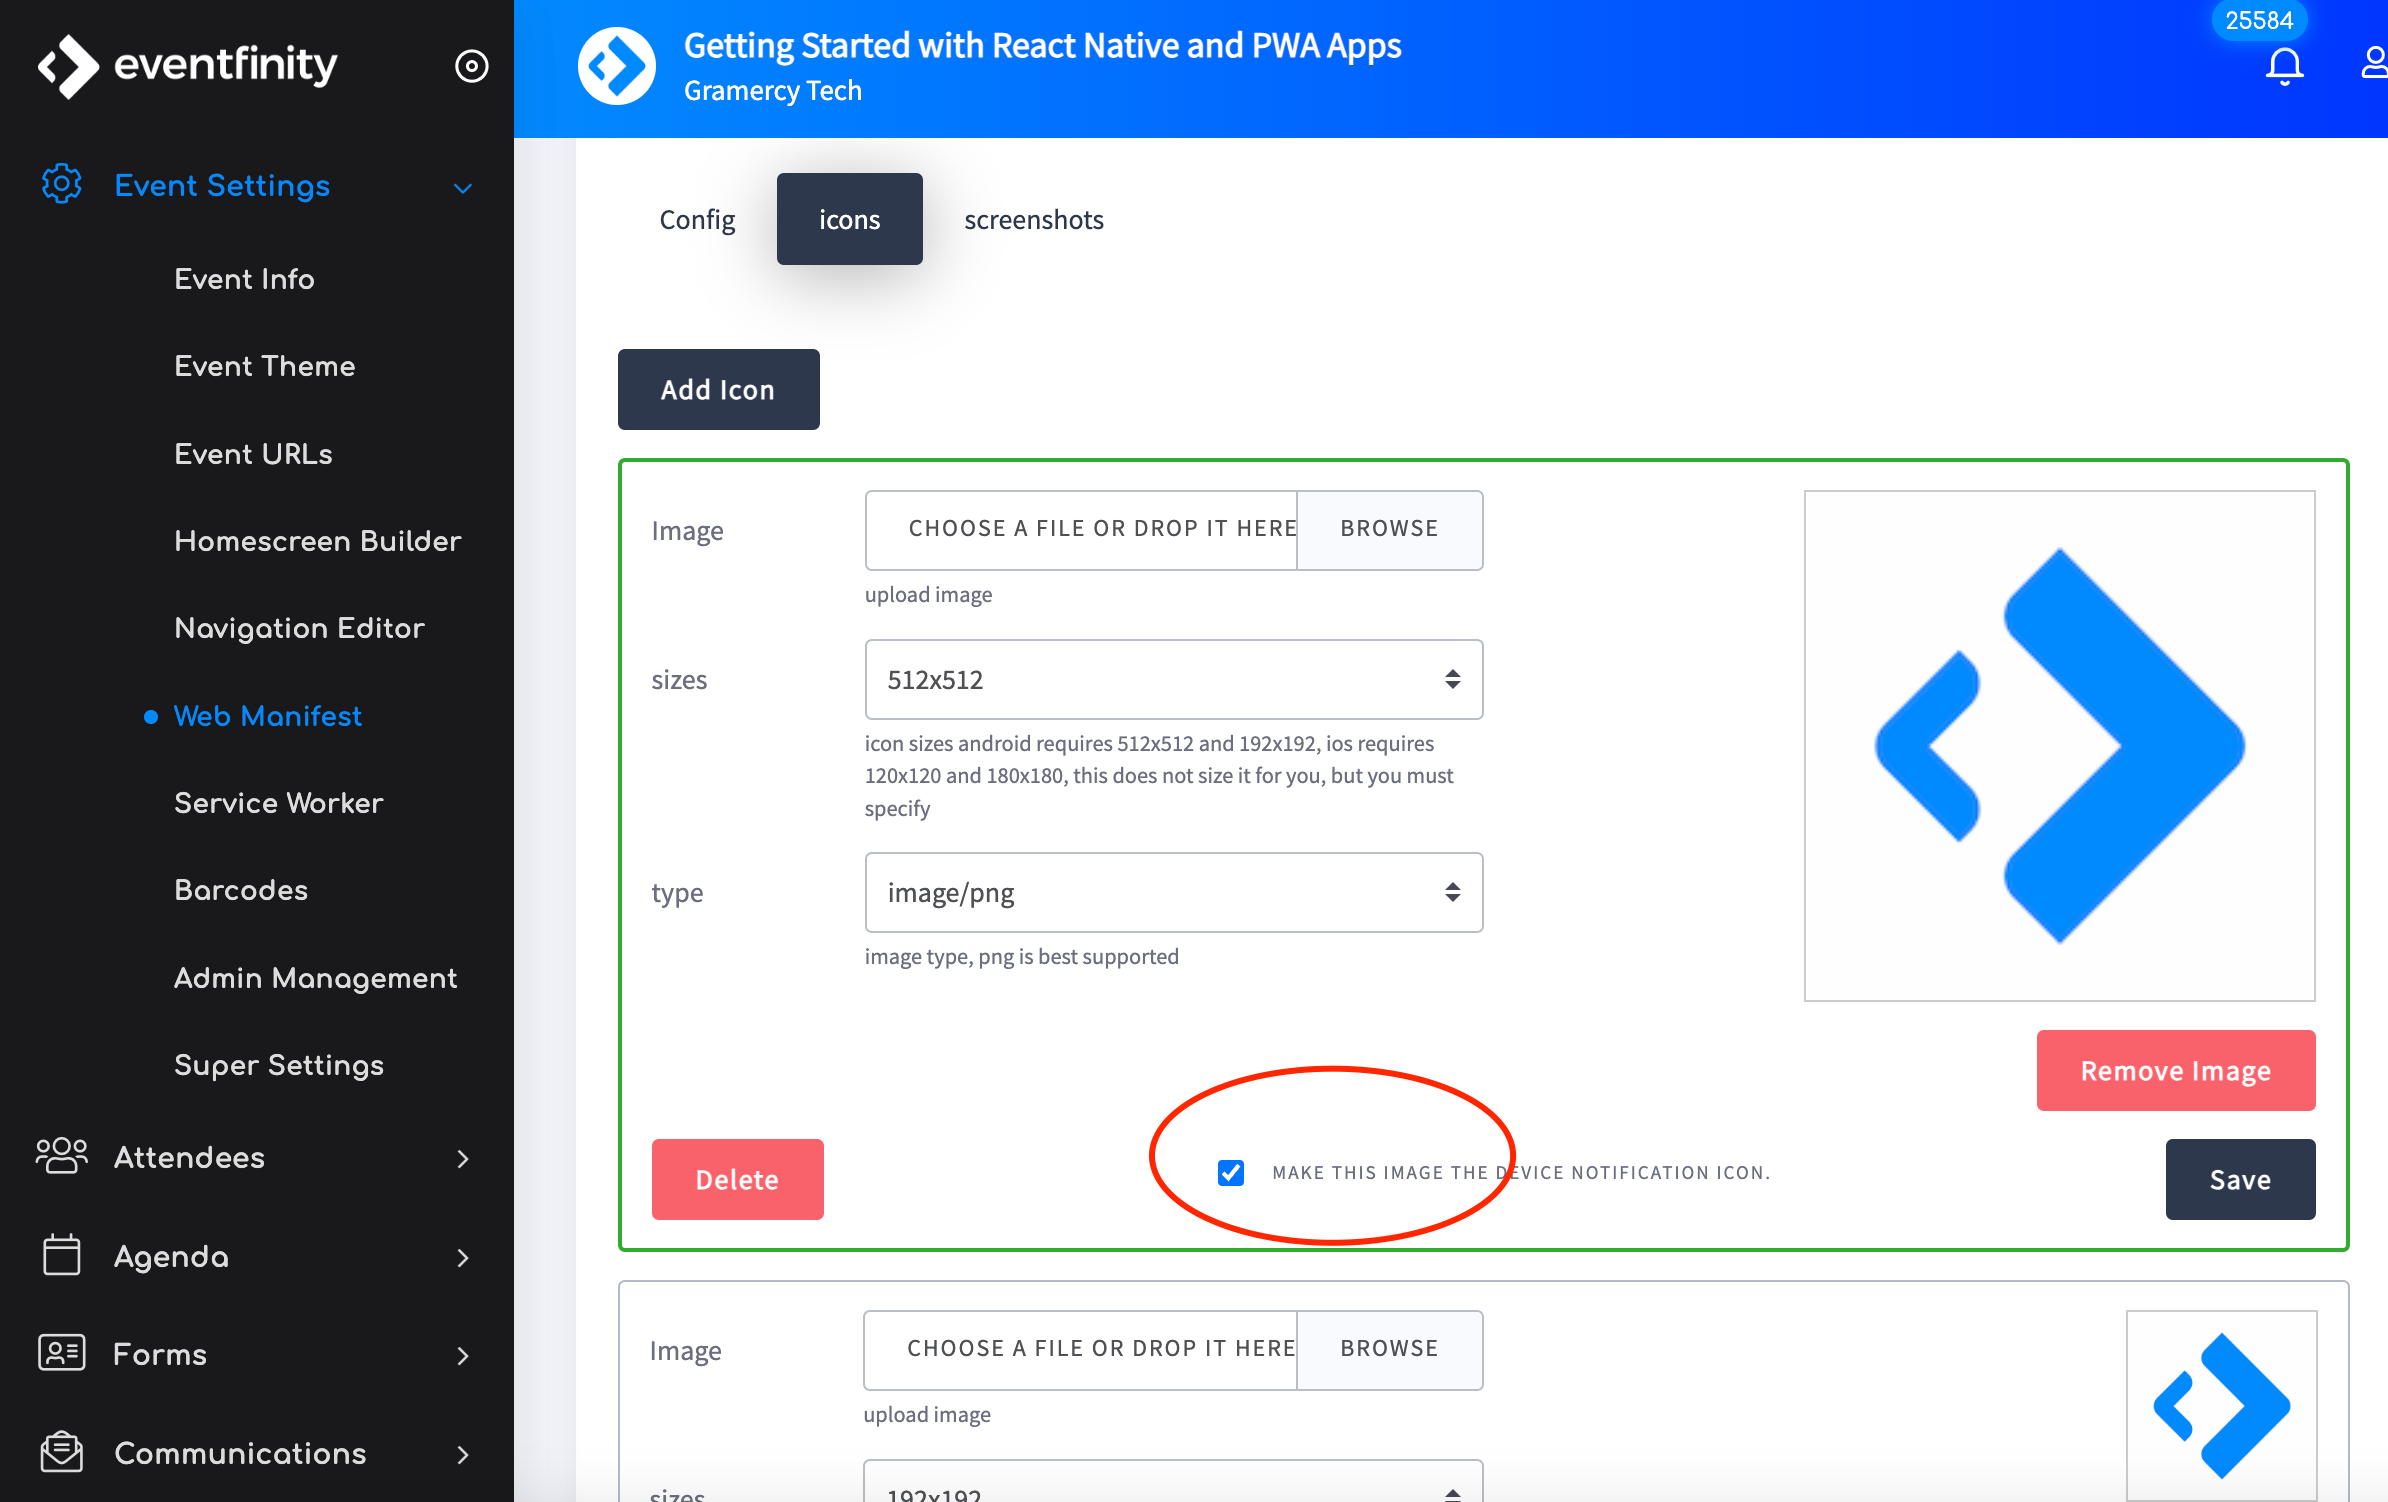
The next step is to make one of the images the device notification icon by checking the appropriate box. Make sure one icon for each device is selected. If an icon is not selected, it will default back to an Eventfinity icon (shown in the example above.)
The final step is to gather 2-3 PNG screenshots of the completed app. These are added on the screenshots tab. Recommend screenshots are from the home screen, agenda, and one directory.
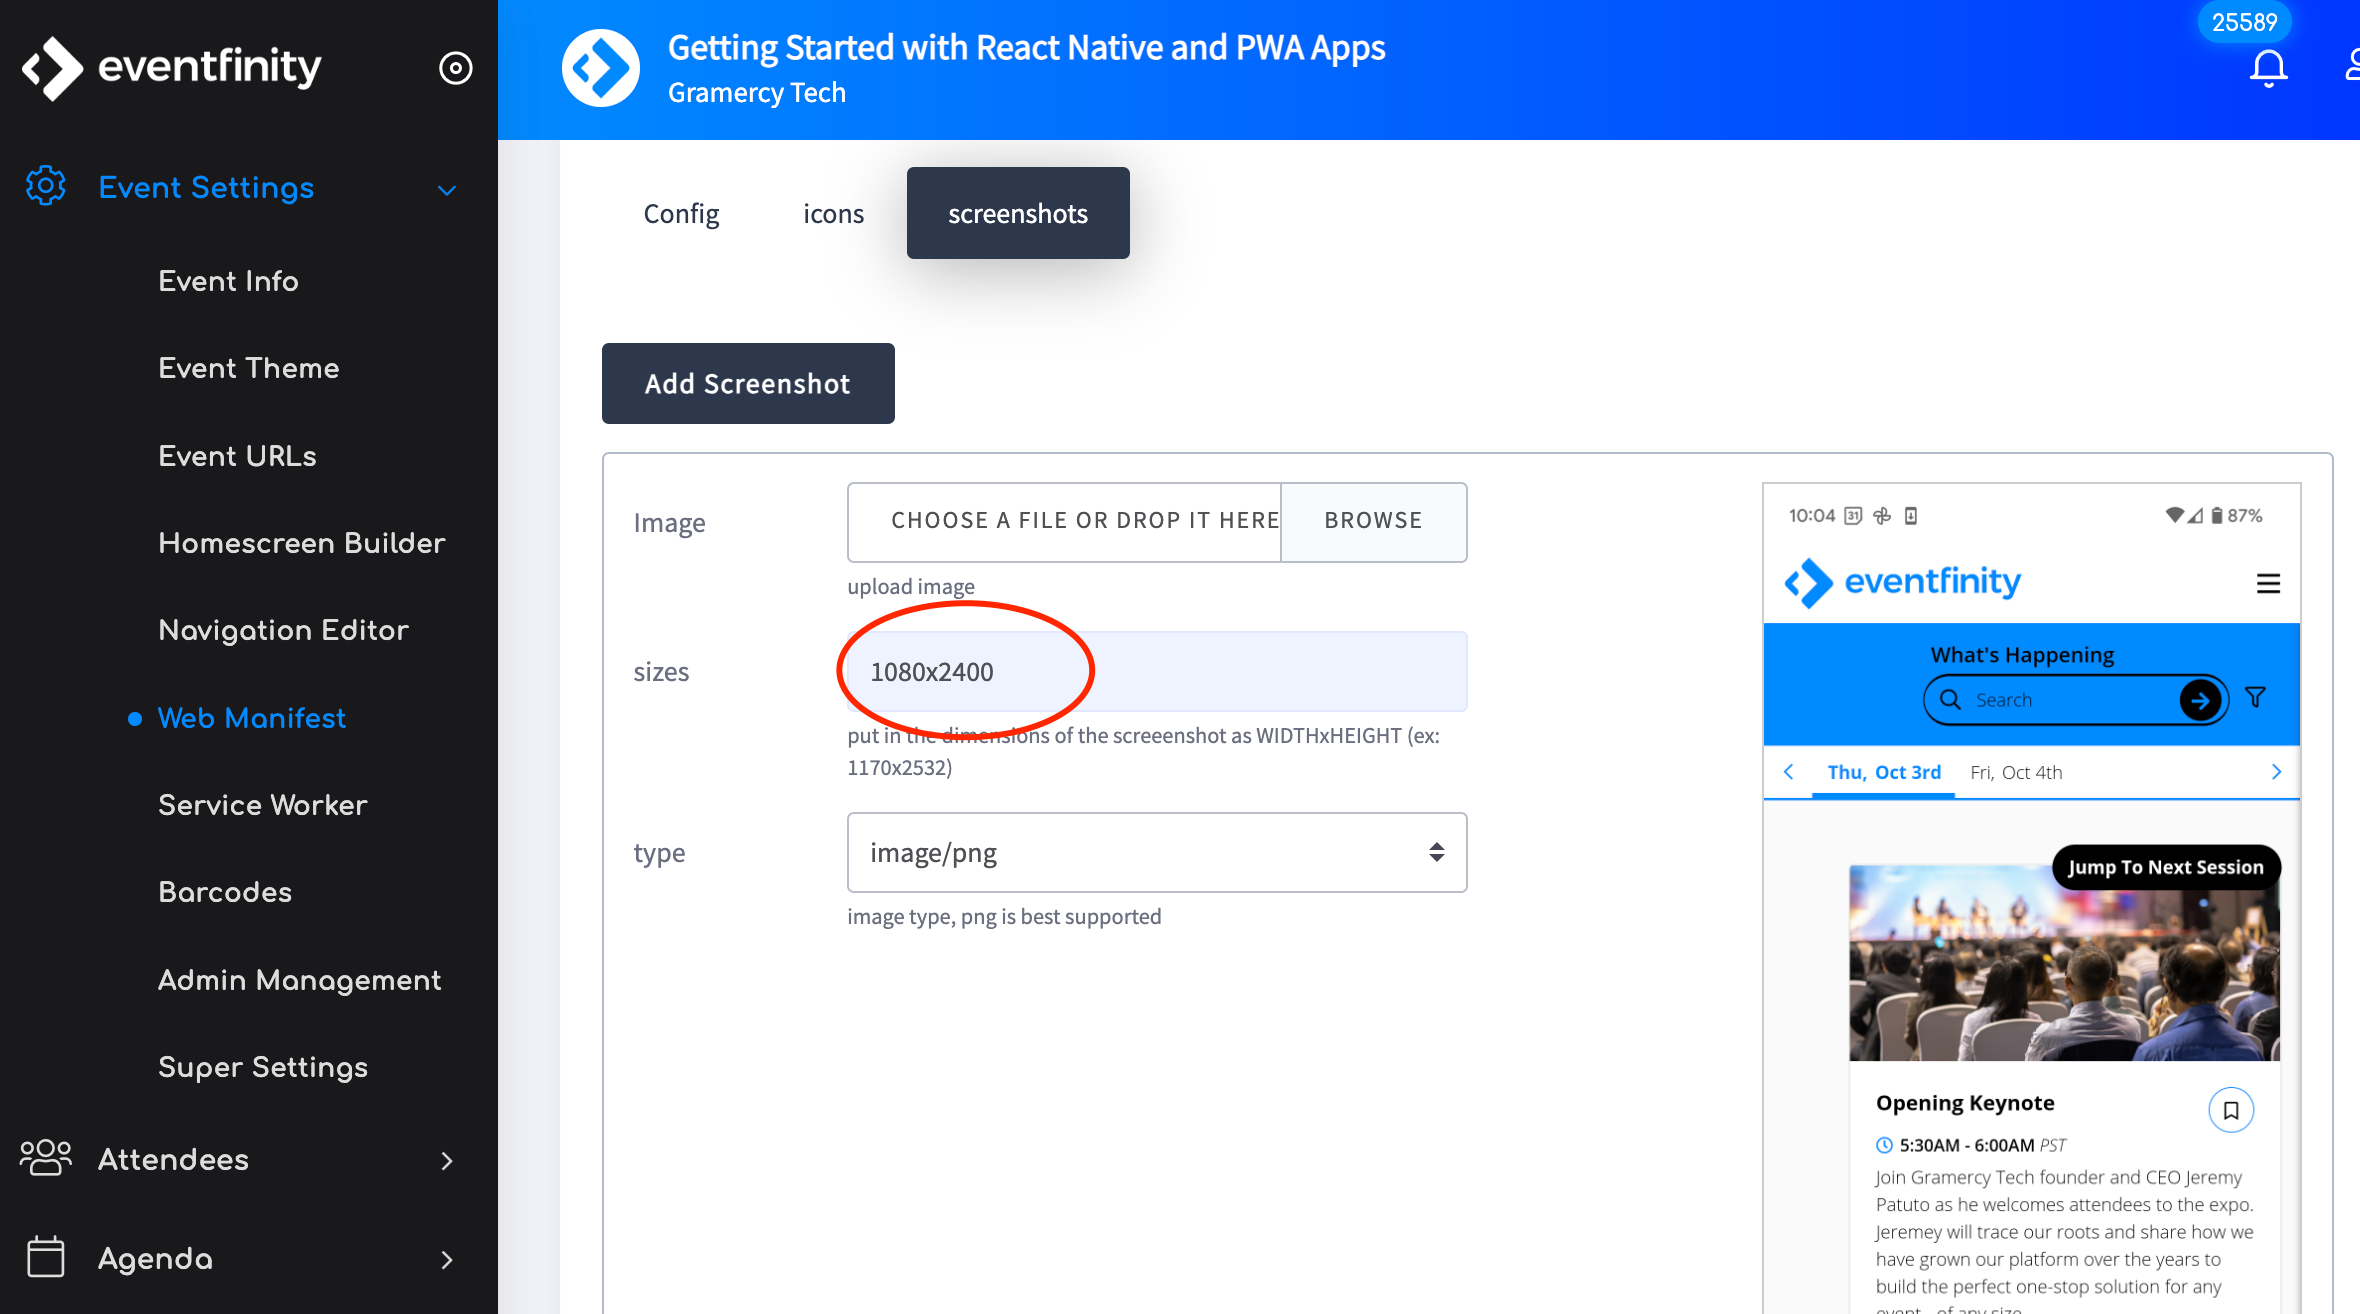
Once you upload the screenshot, manually enter the screenshot dimensions.
Step 5
Add Service Workers
Service workers are intended to enable the creation of effective offline experiences. The service workers are initially downloaded on the initial app installation. They intercept network calls and take action based on network availability. By default, anything linked in the side navigation is included in the service worker routes.
Follow the steps below to add additional items such as home screen blocks, library files, PDFs, etc. that you want to have downloaded on the initial install.
Select Service Workers from the Event Settings menu
Open your event in your desktop web browser and copy the desired URL
Select Add new route
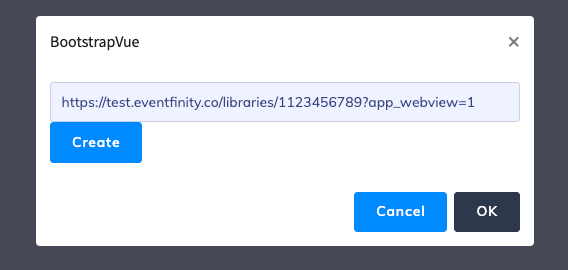
Paste the URL and select Create in the pop-up and select OK (make sure ?app_webview=1 is appended to the url)
Add additional Service Workers as needed.
Step 6
Set up the Navigation Editor
Open the Navigation Editor and set the navigation to Top Navigation.
If side navigation is chosen, the hamburger menu will appear on the left.
To enable bottom navigation items, please see Setting Up App Bottom Navigation
Additional information
Setting up admin permissions
Permissions are set in three places - at the organizational level, the event level and at the admin user level. In order for admins to see Service Worker Cache, Bar/QR codes and Web Manifest ensure these items are selected in your organization, and in the Super Settings. If an admin can not see these items, first check the organization and super settings first, then check the admin’s profile.

